Homemade edible confetti: a tutorial

Edible cake confetti 5

Edible confetti. What’s not to love.

edible cake confetti 4

After I had the idea I googled it and it turns out you can actually buy this stuff. Hence the “homemade” in the title of this post. But making it yourself means you can control the colours and the additives. And spend time when you should otherwise be doing mundane housework enjoying the meditative qualities of kneading fondant icing and flexing your punching muscles.

Edible confetti on cake on white stand

What you need:

  • Fondant icing (I use Orchard brand, available in large supermarkets here).
  • Gel food colouring (I use Americolour and Wiltons brands).
  • Icing sugar and a sieve
  • Baking paper
  • Paper punch (a handheld circular punch works best for this project)
  • Rolling pin
  • Cake cooling rack (good but not essential).

Edible confetti on cake 1

What to do:

1. Start by sifting some icing sugar through your sieve onto a corner of your workspace. Make a little pile of it. You’ll use this to dry the fondant out a bit as you knead it.

2. Tear off a golf-ball sized piece of fondant and knead until smooth and pliable. If it is too sticky, add some sieved icing sugar.

3. Add a drop or two of food colouring. These gel colours are very intense and you only need a little. Better to add a little and more as needed.

4. Knead the colour through the icing until it is even, adding icing sugar as you go to keep it soft but not sticky. It tolerates quite a lot of icing sugar being added without compromising the texture or colour so don’t be afraid to add a fair bit if required.

5. Roll out your ball of fondant as thinly as you can between two sheets of baking paper. It doesn’t have to be paper-thin – just thin enough to get into the paper punch.

Green fondant icing rolled out

Peel your flattened fondant off the paper and place on another piece of baking paper on a tray to dry for a few hours. When it is dry and you can lift the whole thing off the paper without it drooping too much, transfer it to a cake cooling rack if you have one to let the air get to all sides of it. If not, just leave it on the tray and allow to dry for 24 hours.

Once the icing is stiff enough, get punching.

Icing with paper punch

Try not to do this:

Edible confetti on my fingers

That’s it.

I am loving how this looks. Quite “spectacleear”, as my 4 year old would say.

Edible cake confetti 2

And there you were thinking your paper punches were limited to use with paper, washi tape, masking tape, soap and fabric. Oh, you!

This is a post in twirling betty’s paper punch-a-palooza series. If you enjoyed it, you might also like:

1. Paper punch stencils

2. Paper punch fabric luggage tags

3. Paper punch washi tape stickers

4. Paper punch fabric confetti

4. Paper punch sparkly snowflake envelope

5. Paper punch soap confetti

6. Paper punch washi tape cake stand decoration

7. Paper punch stencilling on clothes with masking tape or freezer paper

Large paper punch-a-palooza series header

A singlet for a new babe and a dotty bag.

Love heart singlet close up

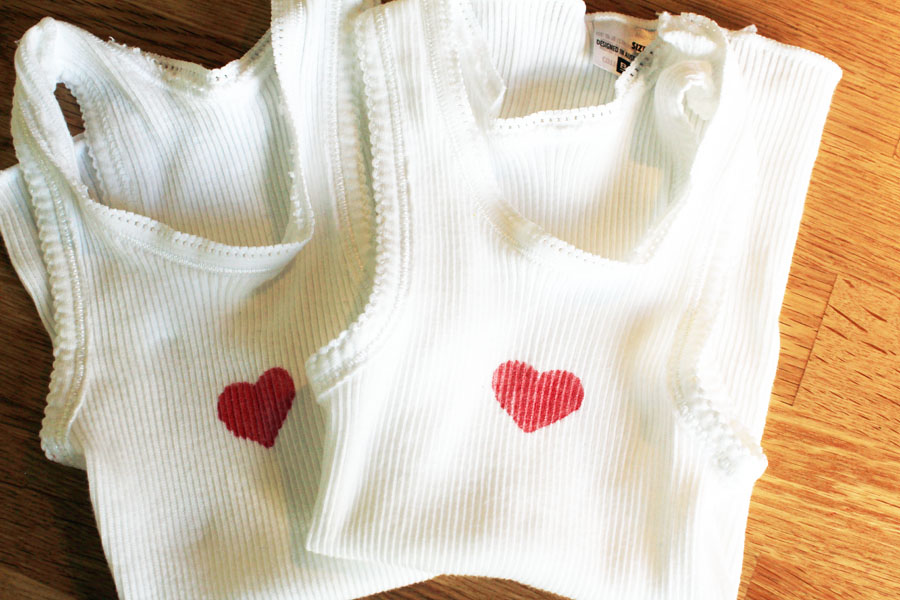
A lovely friend of mine recently had a little girl and I made her a weeny heart singlet for her new love.

Baby singlets kill me.

Love heart singlets

I love the way tiny babes look like shearers in them. Heart singlets are sweeping the shearing sheds of Australia this year, by the way.

I have touched on using paper punches as a stencil in this earlier paper punch-a-palooza post, but it’s always worth coming back to because it’s such a quick but satisfying way to get  templates onto fabric.

You can either punch through freezer paper, or if you don’t have that, use painter’s masking tape on baking paper. It can be a bit trickier to line up strips of tape and so on but generally works equally well.

Freezer paper and masking tape stencils

Also, a little tip: if your punch is not, like our friend Kanye West, the sharpest tool in the shed, place your masking tape and baking paper between two sheets of normal paper and then punch. Your paper. Not your partner. I cannot condone domestic violence.  No matter how many times they try to make you watch Top Gear.

I didn’t need to do that with the smaller heart punch, but my big circular one struggled. These are the stencils I made with the latter.

Masking tape stencils on bag

And the finished product.

Spring in a bag

It’s a Springy bag, I feel. Perfect for market trips to collect the ingredients for my favourite Spring dish.

I was cavalier with my application of paint on my teeny singlets (because that’s how I roll) and, interestingly, the masking tape made for a marginally sharper outline.  I did not expect that. Indeed, I imagine my feelings were very similar indeed to Louis Pasteur’s as each chicken recovered. Very similar indeed. And I don’t want to get too cocky, but I am preeeety sure that my results might have an even larger effect than Louis’ eventual discovery of penicillin. You heard it here first.

Love heart singletThis is a post in twirling betty’s Paper Punch-a-palooza series.

Lilac large paper punch-a-palooza series header

If you enjoyed this post, you might like the other in the Paper-punch-a-palooza series.

If this has got you in the mood to crack out your supplies and punch something  – and then pull our your paper punches and make stuff  – then you might be inspired by these other posts in the series:

1. Paper punch stencils

2. Paper punch fabric luggage tags

3. Paper punch washi tape stickers

4. Paper punch sparkly snowflake envelope

5. Paper punch soap confetti

6. Washi tape cake stand border

Washi tape cake stand border: Part VI of the Paper-punch-a-palooza series

IMG_5212

It’s been a while since we punched stuff together hasn’t it?

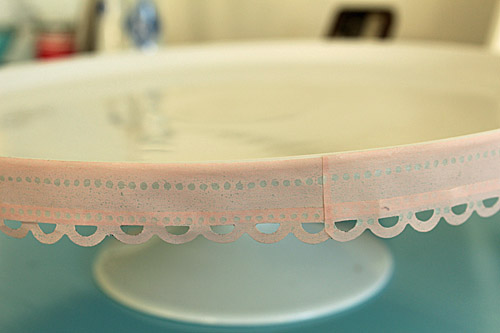
This is a bit of cheat really, as I’ve actually already shared this method of using a border paper punch on washi tape in this earlier Paper-Punch-a-Palooza post. But this is a whole new thing to which to apply it: cake stands! Obviously, you could do this on anything with a rim really. But keep it clean please. Inanimate rims only thanks folks.

Here you can see that I made my border a little deeper by starting with a strip of unpunched tape  and then stuck a scalloped strip slightly overlapping the bottom  edge of that. It’s easiest to prepare your border first and then stick it on, by the way. It saves quite a bit of screaming from frustration.

Washi tape cake stand border

Cute, huh?

Cake stand with washi tape border

This is a post in twirling betty’s Paper Punch-a-palooza series.

Lilac large paper punch-a-palooza series header

If this has got you in the mood to crack out your supplies and punch something  – and then pull our your paper punches and make stuff  – then you might be inspired by these other posts in the series:

1. Paper punch stencils

2. Paper punch fabric luggage tags

3. Paper punch washi tape stickers

4. Paper punch sparkly snowflake envelope

5. Paper punch soap confetti

Punch it up my aggressive little possums, punch it up.

Soap confetti 2

This is a much simpler way to make soap confetti; although first you must source soap leaves. If you consult the Googly fount of all knowledge you will see lots of sources.

I arrived upon mine years ago as a freebie with some contact lense fluid. Sexy. And yes, that does potentially make me a hoarder but also makes me thankful to the crafty Gods. Someone up there was willing me to keep these disturbingly insubstantial soapy bits.

In terms of satisfying process, punching through these soapy wafers was totally unedifying. It’s what I imagine punching through a cobweb would be like.

Still it’s very easy. And there’s always something to be said for that.

Go on, sprinkle some in your bath. It’s like a tub full of gentle, peachy cobwebs confetti.

This is a post in twirling betty’s Paper punch-a-palooza series.

If you enjoyed this you might also like these previous posts in the series.

1. Paper punch stencils

2. Paper punch fabric luggage tags

3. Paper punch washi tape stickers

4. Paper punch sparkly snowflake envelope

5. Paper punch soap confetti: Part 1

Soap Confetti : Part 5 in the Paper-punch-a-palooza series.

I am so excited about this project. I gave myself a blister punching out bazillions of tiny bits of soap confetti to photograph for this tutorial and you know what? It.was.totally.worth.it.

You see sometimes I have an idea and by the time I’ve gathered the materials and tried it out (and often had a few failures along the way) I lose momentum and either never end up following the project through or get as far as photographing it then lack the motivation to write it up.

This was the opposite. From the minute the idea popped into my head to the very last sentence in this post, it has been a pleasure to put together.

I did hit a slight stumbling block at the start trying to source the glycerine soap I needed but then the universe conspired to bring the soap before me in the most unexpected of places: a tiny country town in a quirky little antique shop (you know, whiskey decanters, silver platters and glycerine soap – as you do) and it took right off from there.

I LOVED photographing these luminous little bits of soap. Even the shavings and discarded off-cuts were just beautiful. It’s almost as though the soap is lit from within when you hold it to the light and turning large bars into little pearls of soap magnifies this incandescent effect.

The soap is (of course) solid but looks ephemeral  – especially once it is sliced or shaved into thin, translucent pieces.

So I think that’s enough gushing about soapy bits, let’s get on with the tutorial.

What you need:

  • Brightly coloured glycerine soaps
  • Vegetable peeler
  • A standard hand-held circle paper punch
  • Other punches

TIP: Paper punches that have a decent gap to slide paper (or soap or whatevs) between are preferable. Some have, literally, a paper-thin gap which makes it tricky to insert thicker things. Later on in the tutorial I provide some tips on how to cope with thinner gaps but it’s just easier if your punch allows you some leeway with thickness of your materials.

  • Sharp knife
  • Cutting board
  • Baking paper (aka wax paper, baking parchment)

There are two types of confetti: traditional flat and little jelly-tot-shaped ones, which I am going to call pearls instead of soapy jelly-tots.

Let’s start with pearls.

What to do for pearl confetti:

1. Using a knife, cut off a slice of soap about 2-3mm thick along the longest edge. If the soap crumbles or the slice has distressed opacities (yes, folks, you’ll find all the big words here) within it, try slicing along the short edge instead. In other words, each soap has a kind of grain and you need to ascertain which edge allows you to slice along the grain rather than across it. Each soap is, annoyingly, different. Some give good slice on the short edge, some on the long. Unpredictable, slippery little fellows.

This photo illustrates my point.

See how the longer purple slices are lovely and translucent. But the short yellow ones. Dear Gaga, help the short ones. They have grainy opacities running wild through them.  So for good soap confetti remember this rule: opacity = crap punchability.  It’s a life lesson.

This is a perfect slice of soap:

If you punch through a perfect slice you will get something like this:

Attempting to punch through flaky slices (apart from being just sheer recklessness) results in what you see in the top of the next shot.

2. The next decision is one which, in order to make, you must look deep inside yourself. Just as a young Karate Kid had to contend with “wax on, wax off”, so must you my faithful disciples. Wax paper that is. And yes I do consider myself the Mr Miyagi of soap confetti. (That’s a gratuitous Karate Kid reference for those of you young whippersnappers who are wondering what the dickens I’m on about).

If you choose wax on like this:

it makes it a much cleaner and, frankly, easier process. On the downside, though, you have to remove tiny bits of wax paper off each side. It gets repetitive.

If you choose wax off:

it’s a quicker but messier process. As the soap is handled and heats up a little, it can start to kind of gum up the punch. You must look deep inside yourself and choose which method is best for you, Reader-San. Choose wisely.

I tried ’em all. And used different methods for different bars. I started out with baking paper but I swiftly got sick of peeling off the tiny bits of baking paper from each pearl (although you can kind of get a rhythm going if you slide your fingers in opposite directions across the pearl).

So then I tried without and initially that seemed really good but the pearls tend to stick in the catchment area of the punch. Using a toothpick to coax them out helps. If your punch is getting all gummed up with excess soap, wipe it clean with paper towel and punch through some normal paper to get the excess off the sharp edges. If you have really soft soap slices or shavings, try putting it in the freezer for 30 minutes and then wrapping paper around it.

Since it’s Valentines Day as I type this, I think it is appropriate to give you another reason why I love my handsome husband so much: he did not bat an eyelid when he went to the freezer to retrieve frozen fish and had to move 20 slices of lightly frozen soap out of the way before he could reach any food.

Similarly, I renewed my decision to keep him when, after ranting and raving around the kitchen one night when I couldn’t find the vegetable peeler and pretty much accusing him of having put it in the wrong drawer or losing it altogether, Sophia (6.5 yrs) piped up with “Mum, it’s in your study with the soap”. Erm, yeah.

I had to grovel a leedle bit. And he deserved my grovelling. Bitchy craft woman.

What to do for traditional flat soap confetti:

1. Use a vegetable peeler to make shavings.

2. Unlike with pearl confetti, you should ALWAYS wrap your shavings in baking paper before punching. Just trust me on this one.

3. If the shavings are still too thick (some punches truly have just a paper-thin opening) use a rolling pin to flatten your shaving. Again, I find it easier and less messy to do this after you’ve wrapped it in backing paper.

So now let us chuck some soap confetti in the water and see what happens.

Perty, no?

As it sits in the water the colours of the soap pearls begin to fade and they slowly become opaque.

I think this would make the sweetest Valentine’s gift, or indeed gift at any time. I set aside some of the heart confetti for my girls and packaged it up in yet more baking paper and sewn together.

I’ll give it to them as they hop in the bath tonight.

Yes, I am totally loving this project and I really hope you do too.

Happy Valentine’s my beloved readers. I do, truly, madly, deeply love you.

And lest you think it’s all zen-like Karate Kid crafting and neat little punchies over here, check out my kitchen bench after my ‘sperimentations.

The soap I found in my out-of-the-way antique shop and used for this tutorial is from Body Treats and can be purchased online in Australia here.

I’ll be back shortly to show you another way to make soap confetti… from soap leaves and to tell you how to use up the soapy off-cuts from today’s project! Yep, the punching never stops around here.

———————————

This is a post in twirling betty’s Paper punch-a-palooza series.
If you enjoyed this you might also enjoy these posts in the series:

1. Paper punch stencils

2. Paper punch fabric luggage tags

3. Paper punch washi tape stickers

4. Paper punch sparkly snowflake envelope

Sparkly snowflake envelopes: Paper punch-a-palooza: Part 4


My girls finished their letters to Father Christmas last week. They spent so much time on them I thought it only fitting that the envelopes were a bit special too.

If you just slip some aluminium foil behind the snowflakes, they sparkle and glitter like mad in the sunlight. It’s such high reward for such little work. My favourite kind of craft with kids.

Fabric luggage tags: a tutorial : Part 2 in the paper punch-a-palooza series

We went away for our annual family holiday recently and, as is my wont, I decided to add to the general chaos of preparation by making a whole lot of stuff. Including some of these fabric luggage tags.

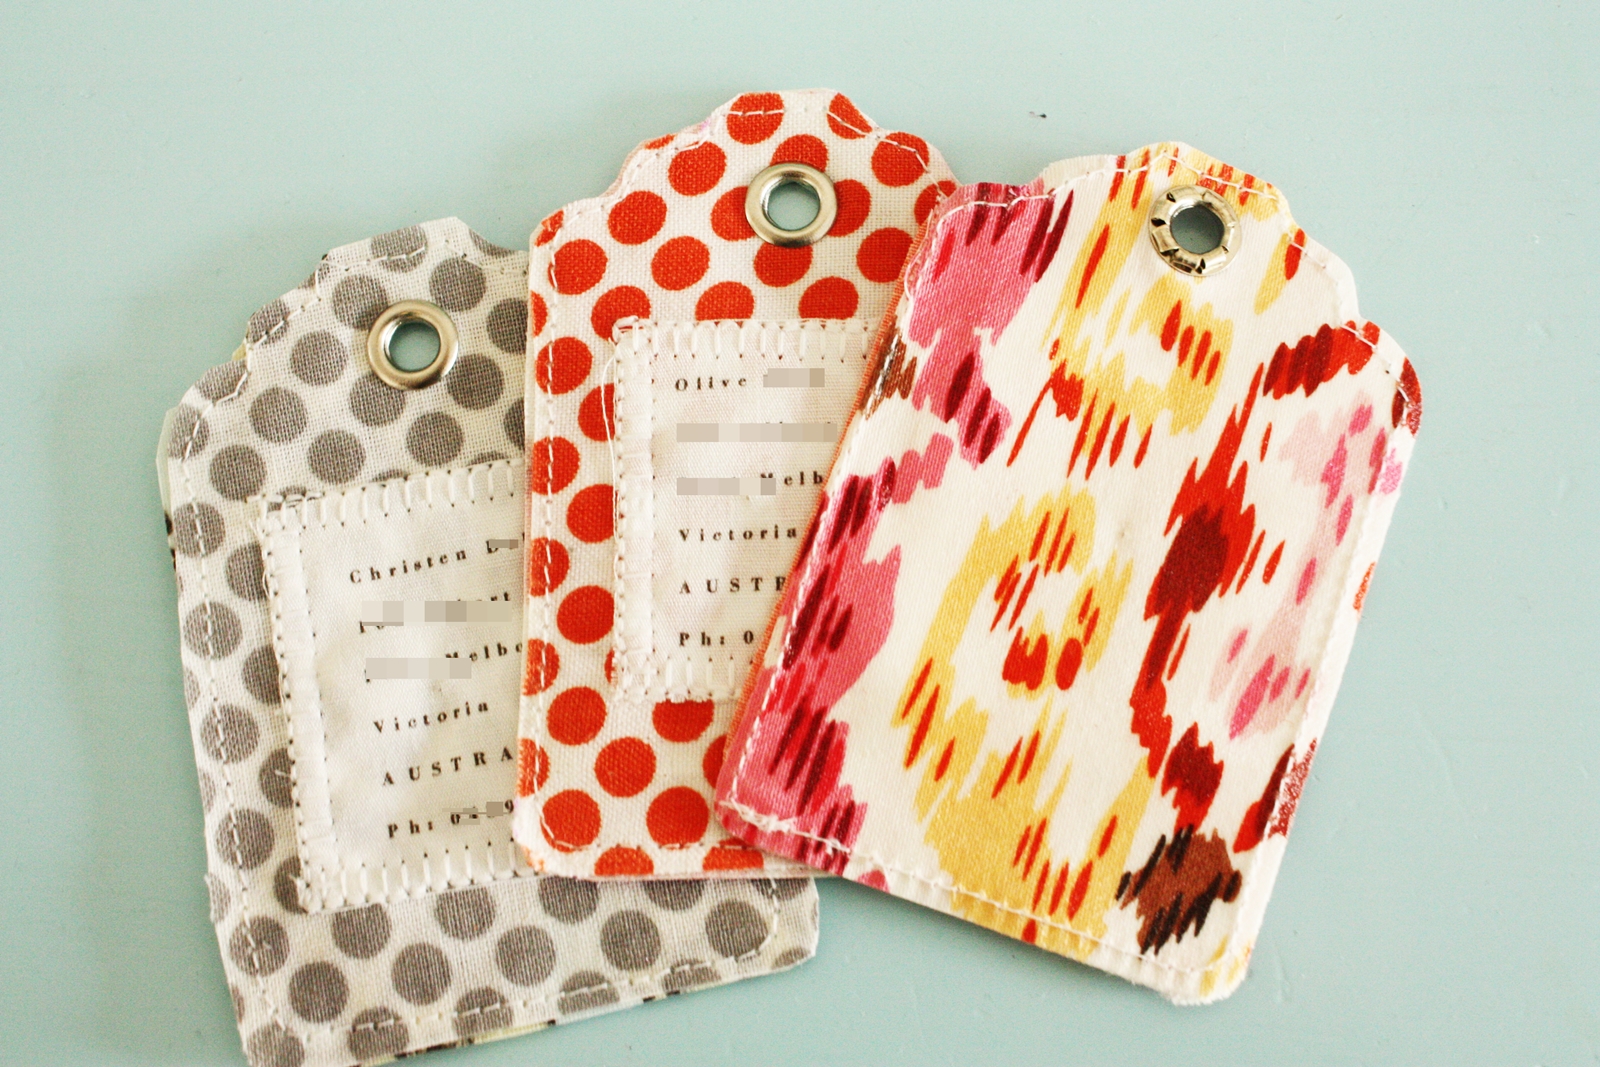
One of the things I love most about making stuff is that I can use fabric in patterns and colours that I really love. The fabric on the tag on the far right is my newest obsession. You’ll see a bit more of that in some upcoming posts.

Anyhoo, these luggage tags were v satisfying to make, relatively simple (other than some bruising on my hand from hard-core punching) and held up extremely well when I put them to the test.

What you need:

Large tag-shaped paper punch (or a cardboard luggage tag template and some sharp scissors)*

Fabric to create two luggage tag punchies – one for the back of the tag and one for, ummmm, the front.

PVA-type  clear-drying glue (not Mod Podge, though)

Printable fabric, or alternatively, fabric pens or stamps

Circular paper punch (diameter of roughly 6mm/0.25″)

Metal eyelets

* Look, I know this is a paper punch series and all but here’s the thing about this project – the paper punch isn’t absolutely essential to it which is why I’ve offered the template and sharp scissors alternative. So is this technically a punch-a-palooza-worthy project? Why yes my friends, because even if you cut your tag out, you still need a little circular punch to create the hole to thread your loop through. Known in professional punching circles as a double whammy, you don’t come across the old “punch within a punch” very often. In fact, they’re as rare as Kim Kardashian’s brain cells. So yep, practically endangered.

I’ve been toying with the idea of getting one of these monster-sized tag punches for aaaages and I’m so glad I finally bit the bullet.

They are great for turning out gift tags from any pretty paper or left over cards you have.

Aaaaaanyhoodles, let’s move right along get our punch on.

What to do:

1.  Cut rectangular pieces of  fabric a few centimetres larger than your luggage tag will be on all sides.

2.  Smear both sides of your fabric with PVA clear-dry craft glue or the like. DO NOT use Mod Podge as it doesn’t leave the fabric “crispy” enough. Allow to dry thoroughly, preferably overnight in a cool spot.

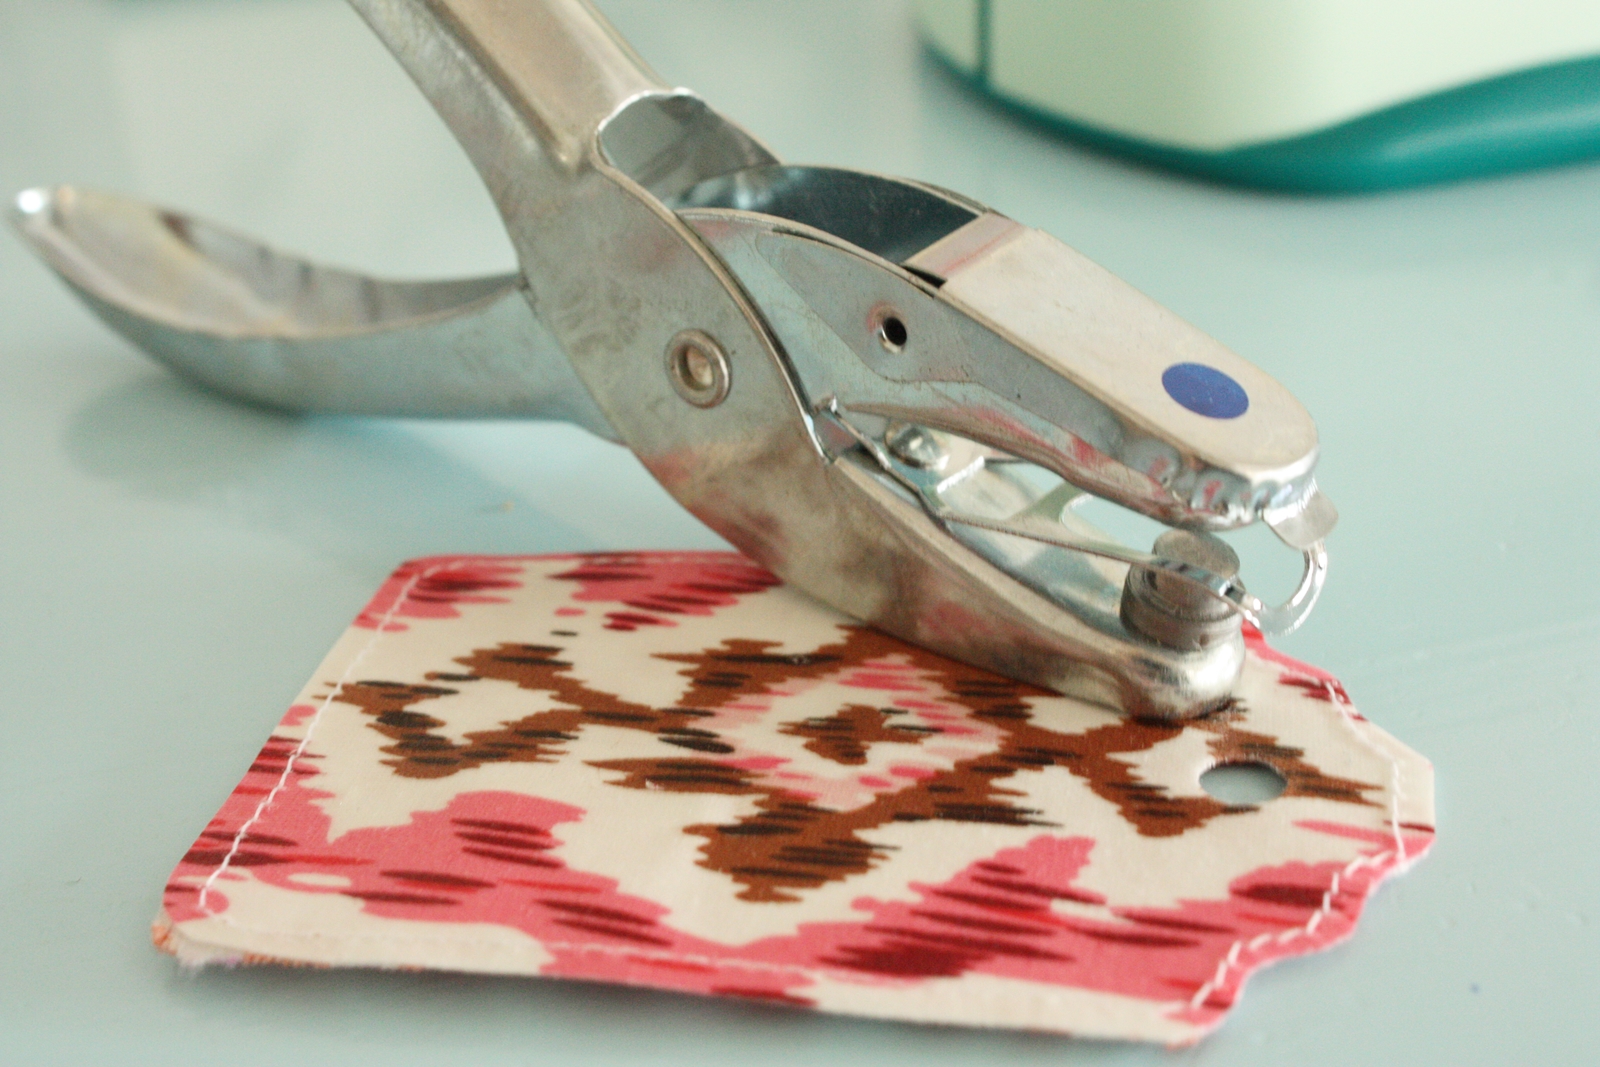
3.  Once your fabric has dried and crisped up sufficiently, slide it into your punch, take a deep breath (first ensuring your punch is on a solid, flat surface) and smack the bottom of your palm quite hard onto the punch lever. I am not going to kid you, this project is not for cravens.Yep, no pain no gain.

Well, some gain because, as I mentioned above, rather than potentially breaking all of the small bones in the bottom of your palm, you can simply trace a tag shape and cut it out.

And in any case, if you do go the paper punch route, hopefully you shouldn’t have to punch that hard to get a result. The thing to remember is we are not punching through paper here. But we want to get our fabric as close to that state as possible. So you’ll have more luck with finer, lighter fabrics rather than heavy quilting cottons. For example,  thick calico did not punch well. Finer calico would though I think.

Having said that, the tags in the photos with the grey and orange dots are heavy quilting cottons. So it can be done. If you don’t mind severe bruising of your palms.  I don’t. But then I’m pretty tough.

4.  Next, align your front and back luggage tag shapes and using sharp scissors, trim any bits you need to get them to match up as closely as possible.

5.  Now you need to create your address lables. I tried stamping straight onto a calico back:

And then when I was unhappy with my impatient, messy stamping (and that was before I digitally scribbled out personal details) I printed tiny lables using printable fabric that I just ran through my computer. I explain all about printable fabric in this post.

6.  If using a little lable, pin it in place and sew onto one of your tag shapes.  I used the cute stitch on my sewing machine that I refer to as “fake serger” to stop the edges fraying.

7.  Now pin your two tags together and pin to keep them aligned. Sew around the edges

8.  Use your circular paper punch to punch a hole in the top of the tag.

9.  Insert a metal eyelet and hammer into place.

Alternatively, just sew around the hole a few times to reinforce the area.

10.  Create the loop strap for your tag. I used some stretchy, durable ones I took off some airline issued tags. If your luggage is going in a luggage hold then you will need something stretchy and strong so that when other luggage moves on top of it, the tag stretches and holds rather than snapping.

For the tags I put on the kids backpacks, I just sewed ribbon together to create a loop.

Possible variations and uses:

  • houndstooth or plaid for the gents in your life (not sure whether that would punch well though – might be a cutting one).
  • make a set of these for a family heading off on a trip.
  • give them as favours at travel-themed events.
  • you could even, if you had too much time on your hands, use them as invitations for a party. Get the guests to bring their tags along with them and then sew their personal details over the top of the event details and post the tags back to them with your thank you notes.

Results of the road test.

Apart from the calico which frays at the drop of a hat, none of the other tags had the slightest signs of wear. The glue really kept them neat.

Here are the really brave pioneers after a total of 8 hours in the luggage hold of a 747 followed by rough treatment on the luggage carousel and 2 hours in a car boot. They held up beautifully.

Sniff. My tough, courageous little tags.

Bless their little hearts.

Paper punch-a-palooza 1: paper punch as stencil maker

When you use a paper punch, have you ever thought about the negative space it creates and how you might use that? No? You had better things to do like live a full and interesting life? Well, while you were off having quality time with family and gorging on Umbrian truffles, I was thinking about the negative space a paper punch left.

The donut hole, if you will.

These bits.

Christmas is coming (hooray) and so what better project to start with than these stencilled napkin ties.

So here is my first exciting way to use your paper punch: to create a stencil template

What you need:

  • Masking tape/painters tape
  • Greaseproof paper/baking paper
  • Paper punch (duh.)
  • Fabric paint/fabric texta (felt tip marker)/fabric crayon. ie, something to draw on fabric with.

What to do:

  1. Lay a strip of tape along some baking paper and punch out shapes through the tape.
  2. Peel your tape off the baking paper and stick  it to whatever takes your fancy.  In my case, that was sheer fabric.
  3. Use fabric paint ( I like the Pebeo brand) to fill in the stencil template.
  4. Allow pint to dry (or not if you’re impatient like me) and carefully peel off masking tape.

Stay tuned for the next installment in the paper punch-a-paooza series.