Gilded easter eggs: a tutorial

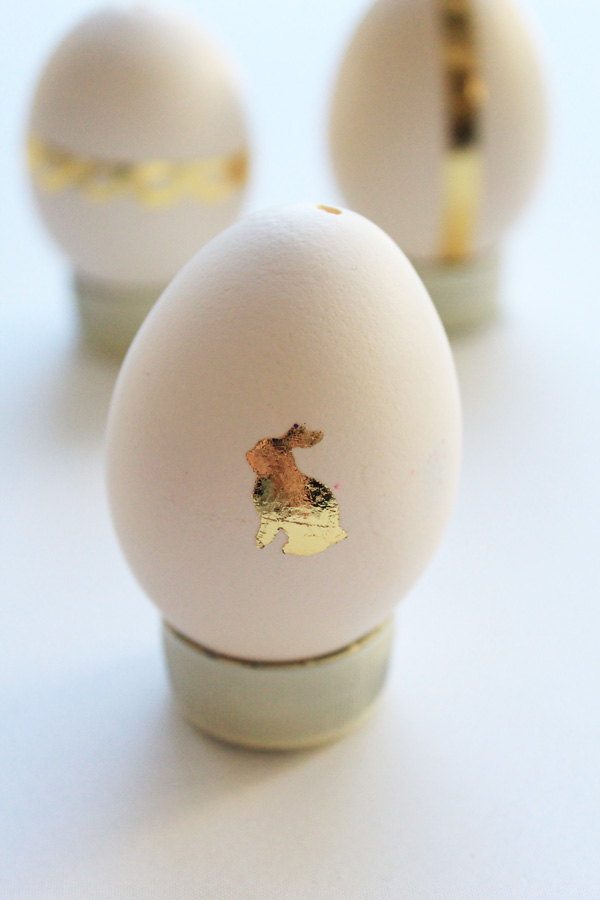
Easter egg decorated with gold foil bunny

What you need:

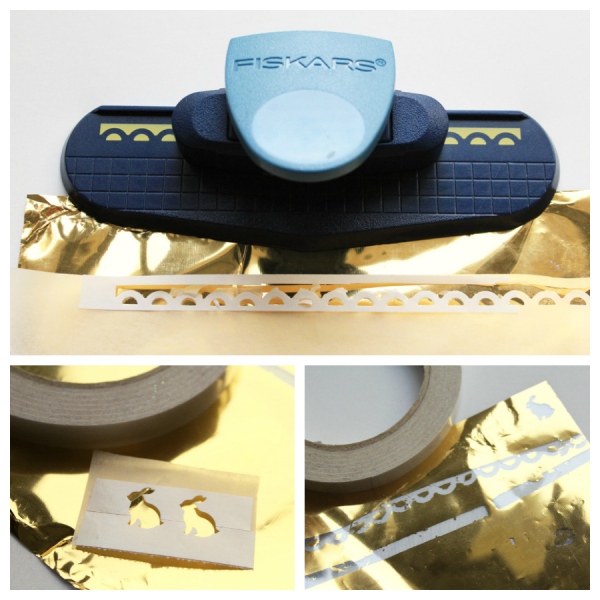
Gold craft foil egg decorating supplies collage

  • Metallic craft foil (I used the one I found at my local craft store, Jones Tones, but there are many brands)
  • Double-sided adhesive tape
  • Eggs

This year I went hunting for white eggs as almost all the eggs you get here, in Melbourne at least, are the brown variety. I tracked some down at the Victoria Market and I’m now obsessed with their creamy, milky purity.

Six 6 white eggs in  carton

Contrary to popular belief, the shells of white eggs are not bleached. White eggs are produced by certain breeds of chook.

What to do:

1. Blow or boil your eggs.

2. Use double-sided tape to create adhesive patterns on your eggs.

3. Rub the dull side of your metallic foil sheet over your sticky bits – or follow the instructions in your pack. Which all sounds vaguely inappropriate but it’s up to you as to how far you want to take that. I am personally known for taking things one step too far so you can guess where I am likely to end up.

You can use strips of double sided tape applied to baking paper and a paper punch to create tiny bunny stickers as I did in the first photo in the post.

Or for something more ornate, a border paper punch is a little fiddly but creates a beautiful result.

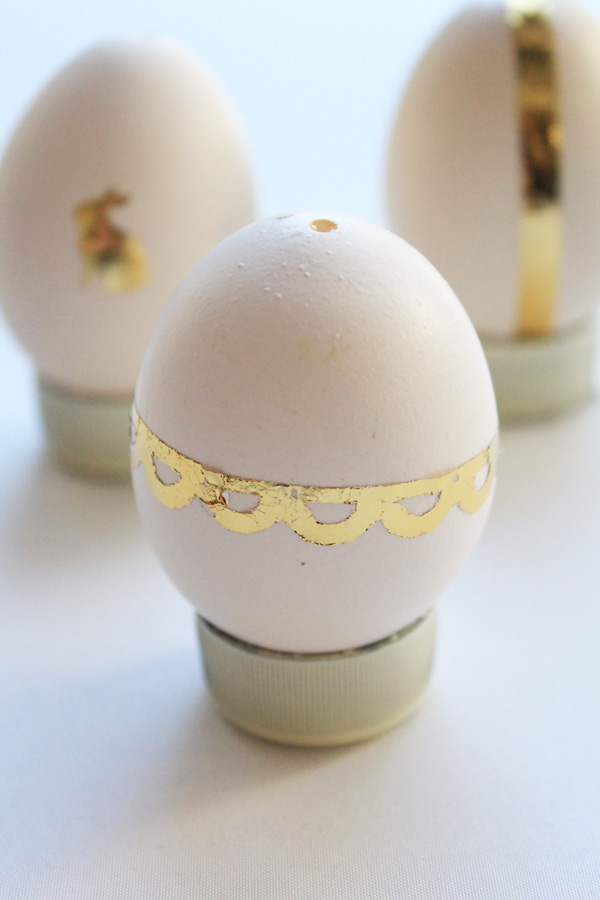
Easter egg decorated with gold scallop design

Or you can just cut strips of your tape to create this simple effect.

Easter egg decorated with gold foil band

However, no matter what method you use, there is no doubt that playdough eggs rolled in glitter produce the most spectacular eggs. As Olive’s creation here attests.


Glitter rolled playdough egg

God, how I love a glittery finger.

Bunny ear headbands: a tutorial

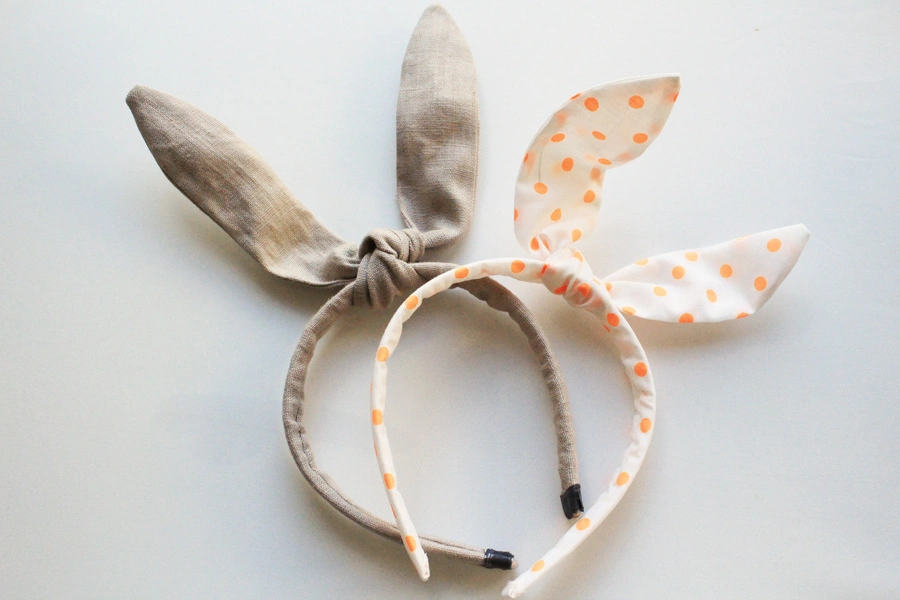
Orange dot and tan linen bunny ear headbands for Easter

I’m not a huge fan of the fluffy bunny ear headbands that abound at Easter but these, my loves, are an entirely different kettle of fish. These I love. These transcend festive timelines and should, nay SHALT, be worn at any time of year.

The beauty of this tutorial is in the simplicity of the wire insert. No need to sew casings, thread wire delicately through small spaces; the fabric alone and the coiled wire I use is enough to get your ears perky but malleable. Not a phrase I thought I would ever write.

What you need:

Supplies for Easter bunny ear headband

  • Fabric – 1/4 metre is plenty.
  • Plastic headband form (1.5cm wide, 38cm around the outside arc).
  • 45cm florist’s wire or other thin, malleable wire.

What to do:

1. Cut the following pieces from your fabric:

a) One rectangle 5cm x 39-40cm.

b) two rectangular pieces 5.5cm x 35cm that will end up looking like this:

Bunny ear headband pattern measurements_edited-1

2. But let’s make our headband cover first.  With right sides of your fabric together, sew the first piece of fabric into a tube using a 3mm seam. I just use the narrow part of my presser foot as a guide i.e. sew keeping the left hand side of the presser foot on the outside edge of your fabric.

3. Turn the tube so that the right side is now on the outside. Turning tubes this narrow can be a bit of a pain. If you’re struggling, this is a good method. I actually have a little device I bought that helps with this process. Any good sewing shop should have one.

Tube of fabric for bunny ear headband

4. Take your two rectangular pieces and lay them right side together. Measure and mark 6cm from one end, then measure and mark 23 cm on from that.

5. From the end of your 23cm long marking, freehand some curvy bunny ears to each end of your fabric rectangle. These don’t have to be perfect (and indeed better if they’re not in my view because you show me a perfect bunny and I’ll show you…well, never mind but I will show you if you want me to) so don’t be too concerned about getting it completely even.

Bunny ear pattern drawn onto fabric strip

6. Cut out 2 of your bunny ear pattern and sew (right side together) using the same 3mm seam allowance, leaving a 5cm gap to turn your fabric right side out.

7.  Once you’ve turned your ears right side out, you might like to gently press them. Or not, if you’re a rough nut like that.

8. At each end of your wire, make a rough coil like this:

Wire insert for bunny ear headbands

When you lay your wire on your turned out bunny ears, the coils should reach about 2/3 of the way towards each end.

9. Insert wire into your ears. You will need to bend it to get it in and then manipulate it straight again once it’s inside.

10. Sew your 5cm gap closed.

11. Slip your thin fabric tube over your headband form and either glue or sew ends closed.

12. Tie on your bunny ears wherever you like ’em. If you’re a lopsided bunny-lover, the world is your oyster at this point.

Fan of the droopy ear?

Tan linen bunny ears headband

I used slightly different measurements for the longer linen ears : 23 cm in the middle and 11cm at each end. Also, I had to wind two pieces of wire together so the insert was long enough.

If your headband form is a different size I think this works as a general rule for covering: measure the width, double it and then add 2cm extra which allows for wriggle room and a 3mm seam allowance.

Orange dot and tan linen bunny ear headbands

Obviously these would look a lot better if I had actual kids to model them but since these are Easter gifts for my girls,  and we are still 3 sleeps out, we will have to make do with these pics sans heads.

orange dot bunny ears headband 2

I’ll update the post after Easter to include photos of  them being worn. If they’re worn. I’m tipping they will be. But then I’ve been wrong in the past. That one time. Just that one time.

We are staying put this Easter and I am looking forward to a quiet long weekend. Does anyone have extra-exciting plans this chocolate-gilded weekend? Please someone tell me they are egg hunting in the gardens of Raffles in Singapore or attending mass at St Peters. Whatever your plans be they modest or grand, travel safely my darlings and, if you do celebrate, Happy Easter. If you don’t, just grab the chocolate anyway yeah?
 

Love and hearts and a bit more love

Pink heart-shaped lamington

My handsome husband never buys me Valentine’s gifts. Which is just the way I like it. I just don’t believe in all the hyped-up commercialism of V-Day. What I do believe in, however, is love. And while I like to shower my peeps in it on any given day, I like positively saturating them on Feb 14th with little tokens to remind them that my love for them runs deeper than Dolly Parton’s cleavage.

Jar of candy hearts

Yep. Deep.

This year I was inspired by a picture I bought ages ago from beautiful Etsy artist Golly Bard.

Jar of Love

Jar of Love hangs in my study and I love it every bit as much as I did when I bought it 4 years ago.

So I made the baby Bettys their own little jars chockfull of love.

Jar of hearts birdseye views

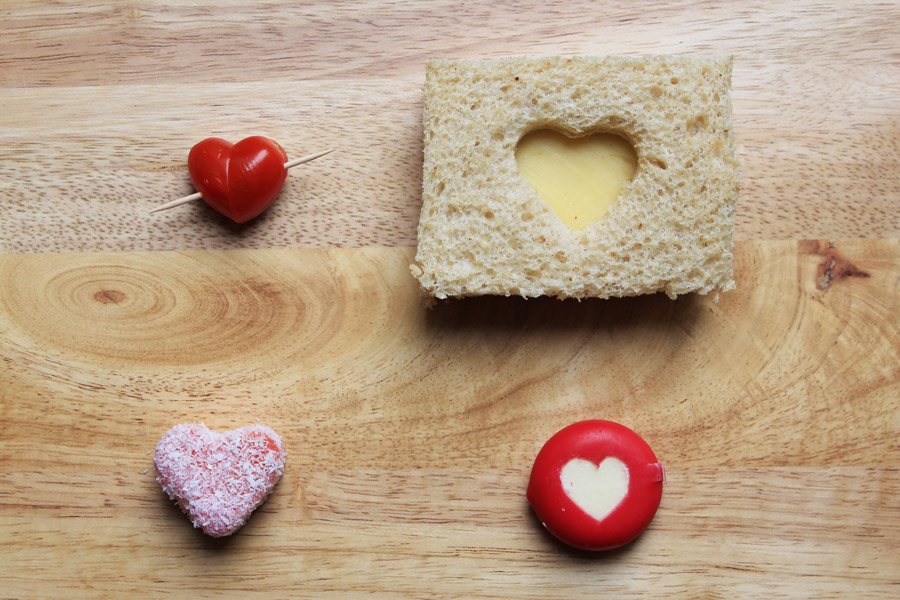
I also like to go totally overboard with their lunches and pack those full of love too. 

Love lunch

Frankly, I defy anyone to tell me that anything says “I love you” more than a pink, heart-shaped lamington.

My grandmother, Betty, used to make these lamos as a treat for us when  we would visit her in the school holidays. We looked forward to them like mad things.

I made this card (from this Photojojo tutorial) for my most handsome of husbands. It’s a shot from our wedding in Bali.

Valentine's card with cut-out heart

I love that pic however, in a startling coincidence, I do appear to be sporting horrifyingly over-sculpted eyebrows very similar to those of a certain infamous Australian who has just been released from a Balinese prison this week.  Well, at least I have the excuse that it was 2001.

I hope your Valentine’s Day and life in general is brimming with that many splendoured thing.

jar of hearts with hearts spilling out

Christmases past

First living wreath

Every year I do it. Get over-excited. Plan too much. End up feeling a bit less jolly and a bit more postal.

Edge of fabric cracker

Not doing it this year.

Gingerbread house - front view

I do have a few things planned – I mean a girl can’t just go cold Christmas turkey now can she?

Christmas drinks invitations and Christmasy polar bear

But mainly I’m just trying to be present. In each moment. And yes, I know how trite that sounds but I am still committed to doing it because I think it is worthwhile.

Cream velvet bow on golden Christmas tree decoration

And my window of opportunity to have little girls looking at the Elf on the Shelf in wonder is swiftly closing.

Christmas Tea light, vintage bauble and shelf elf

In fact, the older one already maintains that she’s sure the elf comes from Ebay and not the North Pole.

Close-up of jingle bells on Olive's stocking

You have to believe to receive, I say. And that puts paid to her scepticism. Out loud, at least.

Cracker

In the meantime I’ve been looking back through some of my posts from past Christmases. I’m re-posting some of my favourite projects and hope they might give you some festive inspiration…or just provide a bit of xmas eye-candy at the very least.

Christmas Card - bunting

Click on the “Christmas ” in the righthand sidebar to see all these and many more Christmas posts. There aren’t really tutorials for most of these but if you want any details , drop me an email (on the contacts page above) and I’ll be very happy to oblige you with  a quick set of instructions.

Christmas candy cane lollipps

I love the wintery-ness of a Northern hemisphere Christmas. Which is completely at odds with the searing heat of antipodean celebrations.

Tolkien's Father Christmas Letters - Polar Bear's Accident

Don’t get me wrong, I relish everything about an Australian Christmas but I simply cannot help but emblazon things with snowflakes. Feels so wrong and yet I can’t stop.  Christmas crack.

Jube wreath close up with description

This cosy Christmas in July was a natural progression for one so taken with the thought of roaring fires and snow-trimmed windows.

Christmas table by candlelight

There’s a white Christmas in our near future. I feel it in me waters.

Starlight mint bauble with description

What about you, my darlings. Grand Christmas project plans? I love to live vicariously so let me know in the comments if you feel inclined. Oh go on, do.

Starlight mint LED lights

Painted wooden serving boards: a tutorial

small aqua ended cheese board gold knife on angle

Last Christmas my brother gave me Jamie Oliver’s latest cookbook: ” Jamie’s 15 minute meals”.  It both inspired and perplexed me.

Blue cheese platter close up

I was  inspired by the painted serving boards in the book but perplexed by the notion that anyone could complete some of the recipes in there in 15 minutes.

Edge of red edge cheese platter

Achievability of the food within aforementioned time limit aside, I’m here to tell you these painted wooden boards (if not Jamie’s recipes) whip up in under 15 minutes. Well, the first coat, anyway. Okay, so maybe don’t start these at a quarter to I’ve-got-to-be-somewhere.  Twenty to should be plenty though!

Pile of 3 wooden cheese boards

Once again, I’ve employed my very favourite masking tape and paper punch stencil method…

Wooden cheese platter board painters tape stencil

with much success.

Painted wooden cheese board blue dots

I hesitated to call this a tutorial as (with so many of my thangs) it really is criminally simple but I’m going to go ahead and do that anyway because I’m badass like that.

Small aqua edged cheese platter gold knife below

What you need:

  • Wooden serving board, cheese board, platter. Whatever takes your fancy. Do ensure it is not treated ie, safe to serve food on.
  • Food safe paint.
  • Painter’s tape or good quality masking tape

I got my food safe paint from ecolour paints.  I highly recommend them. They were lovely to deal with on the phone and very helpful despite the fact I was only ordering sample-sized quantities of paint. You  only need a small amount for this project and 0.5 litre typically costs AUS$13. Pretty decent I think.

Eco colour paint pots

I’m sorry I can’t give you international suppliers but I’m sure a google search in your area would lead you to what you want.

Blue cheese platter with walnuts, olives, quince paste, brieThe other thing I truly LOVE about this company is they can mix up any colour at all. You just choose the paint swatch you want and let them know the brand and name of the colour.

Aqua stripe cheese platter

What to do:

1. Paint your wood.

You can use steel wool to rough it up for a distressed look once it’s dry. Or use painter’s masking tape to create stripes and perfect straight lines. And use your paper punch to make templates. Endless possibilities.

Painted wooden platter in progress masking tape

I am making some of these for Christmas gifts this year. I think a board along with a beautiful cheese knife or even a round of cheese and some quince paste makes a beautiful Christmas present.
Red edged cheese platter closer

I collected my boards from various spots including IKEA and the local supermarket. The olives, however, are our backyard 2013 crop. Salty little bastards but I love ’em. Quince paste is mine too. Satisfying to have two homemade comestibles on the one platter.

Homemade olives

And don’t feel limited to cheese. I had a party last night and served a pile of homemade brownies on some of these boards. If you can put it on a platter, you can put it on one of these.

Red-edged painted wooden cheese board

Acqua stripe cheese board close up

PS: I’ve updated the look of my blog. I struggled to let go of my twirling chick on horseback but I’m much happier with the cleaner feel of this new design. Also, for a long time I’ve wanted a theme that  showcases my photographs better. They’re now bigger (in the horizontal view) and, I hope, better for that fact. Whaddya think?

A singlet for a new babe and a dotty bag.

Love heart singlet close up

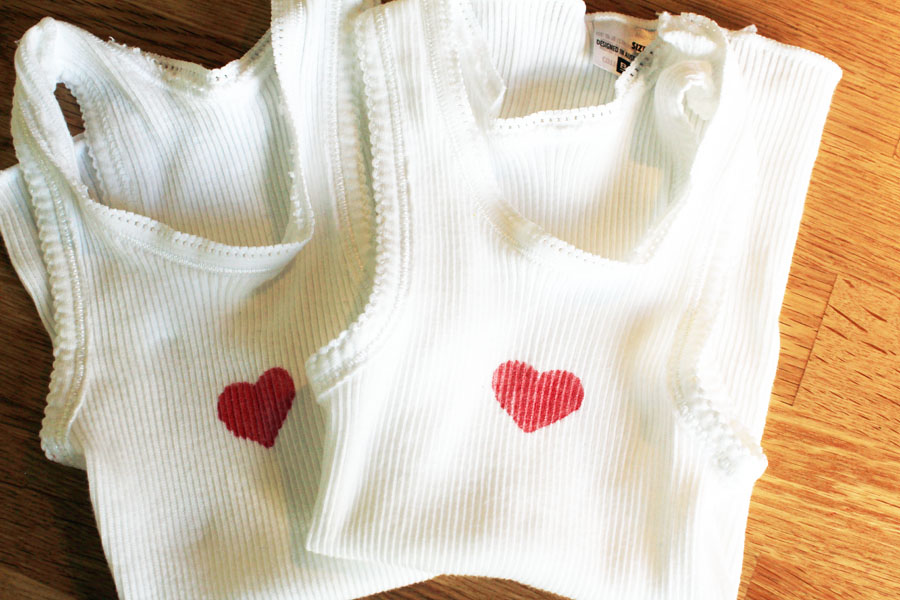
A lovely friend of mine recently had a little girl and I made her a weeny heart singlet for her new love.

Baby singlets kill me.

Love heart singlets

I love the way tiny babes look like shearers in them. Heart singlets are sweeping the shearing sheds of Australia this year, by the way.

I have touched on using paper punches as a stencil in this earlier paper punch-a-palooza post, but it’s always worth coming back to because it’s such a quick but satisfying way to get  templates onto fabric.

You can either punch through freezer paper, or if you don’t have that, use painter’s masking tape on baking paper. It can be a bit trickier to line up strips of tape and so on but generally works equally well.

Freezer paper and masking tape stencils

Also, a little tip: if your punch is not, like our friend Kanye West, the sharpest tool in the shed, place your masking tape and baking paper between two sheets of normal paper and then punch. Your paper. Not your partner. I cannot condone domestic violence.  No matter how many times they try to make you watch Top Gear.

I didn’t need to do that with the smaller heart punch, but my big circular one struggled. These are the stencils I made with the latter.

Masking tape stencils on bag

And the finished product.

Spring in a bag

It’s a Springy bag, I feel. Perfect for market trips to collect the ingredients for my favourite Spring dish.

I was cavalier with my application of paint on my teeny singlets (because that’s how I roll) and, interestingly, the masking tape made for a marginally sharper outline.  I did not expect that. Indeed, I imagine my feelings were very similar indeed to Louis Pasteur’s as each chicken recovered. Very similar indeed. And I don’t want to get too cocky, but I am preeeety sure that my results might have an even larger effect than Louis’ eventual discovery of penicillin. You heard it here first.

Love heart singletThis is a post in twirling betty’s Paper Punch-a-palooza series.

Lilac large paper punch-a-palooza series header

If you enjoyed this post, you might like the other in the Paper-punch-a-palooza series.

If this has got you in the mood to crack out your supplies and punch something  – and then pull our your paper punches and make stuff  – then you might be inspired by these other posts in the series:

1. Paper punch stencils

2. Paper punch fabric luggage tags

3. Paper punch washi tape stickers

4. Paper punch sparkly snowflake envelope

5. Paper punch soap confetti

6. Washi tape cake stand border

Miss Honey Joy – the new home of cake bunting and other gorgeous handmade things

Floral flags - full length - hi res

At the end of last year I decided I didn’t want to make my cake bunting anymore. But having invested so much time in creating the products, photographing them appealingly, discovering they were popular and subsequently gaining such a lot of good press, I couldn’t bring myself to just let it fade away. It seemed a bit of a waste.

Harrison bunting - plaid cake - square - hi res

I began to consider who, if anyone, might want to take the reigns.

Olive banner - yellow balloon - spangle cake - full length - hi res 2

About 2 years ago a gorgeous girl called Julia contacted me to say thanks for my cake bunting tutorial as it had enabled her to make some gorgeous decorations for her sister’s wedding. She was kind enough to include some photos and they were lovely.

mr & mrs cupcake flag by Miss Honey Joy

When I responded she mentioned she was toying with the idea of starting her own crafty business but was not quite at the point yet – she imagined it was something she might do if she one day had a baby and was on maternity leave. And we left it there.

Miss Honey Joy spotty yellow tag

Some 2 years later, when I began to mull over who might take on twirling betty cake bunting, the lovely Jules popped into my mind. I had no idea what stage she was at in her life but thought it couldn’t hurt to put the proposition to her. And, serendipitously, she was newly up the duff and starting to contemplate a crafty biz with more focus! I LOVE it when stars align like that. It was totes meant to be.

Miss Honey Joy screen printed card

So, I am delighted to introduce you to Jules’ gorgeous Etsy shop, Miss Honey Joy. As you’ll see, it’s packed full of cake bunting and banners but also other lovely things: hand stamped gift bags and cupcake toppers, screen-printed cards and tags and larger garlands too.

Miss Honey Joy jute and twine garland

Jules’ products are beautifully made – she REALLY cares and it’s evident. I cannot even express how happy I am that not only did I find someone I could trust to invest the same level of care and effort as I did but that is also just a gorgeous human being.

Yellow heart cupcake flags Miss Honey Joy

Please do pop over and have a browse in Miss Honey Joy and, if you do order from Jules, let her know I sent you.

Miss Honey Joy garland

And you can follow her on Pinterest – she has the most exquisite taste.

evie is one bag by Miss Honey Joy

Handmade Jakarta

Sarinah is an Indonesia department store chain that has all the usual clothes and accessories but also large sections (and in the case of the one in central Jakarta, several floors) devoted to Indonesian handcrafts, including carving, painting, fabric (mainly batik but lots of ikat too); pretty much everything, really.

I spent an afternoon on my recent trip to Jakarta happily lost in there.

This life-size tiger was never coming home with me but it was amazing. As I was crouching to take a photo at close quarters, a shop keeper standing behind me growled in the otherwise silent store. I got such a fright and he and his mate then peed themselves laughing. As did my friend and I. Once my heart rate had returned to normal.

Reams and reams of batik fabrics covered the tables.

Look, it isn’t for everyone but as a long-time Indophile I am very fond of it. Not the shirts so much but there are some beautiful dresses. And check out the lampshades. Want one of those.

This sparkly batik, unlike the wooden tiger, did come home with me.

As I mentioned in my last post, ikat is still very in evidence in the design world. There is lots of ikat-inspired fabric but the real stuff, the stuff that is made in the traditional way where the warp and weft threads are pre-dyed and then woven to create patterns, is much rarer. Not least because it’s such a complex process.

This rug was made entirely by hand using dyes derived from local plants in Sumba, one of the lesser Sunda Islands in Eastern Indonesia that is particularly famed for its ikat.

This perfect example so very nearly came home with me.

But it was AUD$400. Which in many ways is so reasonable for what it is. But expensive for me. Plus after a discussion with my handsome husband I got the impression he may have filed for divorce if I proceeded. And I’m quite fond of him so decided against it.

The ubiquitous crafty owls have even made it to Jakarta.

Fabric headbands.

And these fabric covered bead necklaces (my tutorial here) are so twirling betty. Loved ’em.

20121109-194652.jpg

20121109-194711.jpg

Need to go back…

Simple felt and fabric ipad cover: a tutorial

I love any opportunity to make something to snuggle something else within. And this ipad case is snuggly in extremis.

I hit on the idea (and it slapped me for being so presumptuous) the night before our trip to Far North Queensland last year. I’ve been using it ever since and it has held up like a trooper. I also love a pretty trooper.

Yet another thing I love is the ikat-inspired fabric.

Ikat, as I’m sure you know, is so hot right now. But did you know real ikat has been hot in Indonesia since the dawn o’ time? Did you also know we get the English word “amok” from Indonesian? As in “she saw swathes of authentic ikat  in Jakarta and very nearly ran amok”.

What you need:

  • Two pieces 3mm (1/8″) thick wool felt. Each piece measures 27cm x 22cm (10 1/2 ” x 8 3/4″)
  • 1 piece fabric measuring 25cm x 20cm (9 3/4″ x 7 3/4″) (if your fabric frays easily, you may wish to add an extra centimetre or 1/2 inch to the fabric measurements then hem your piece to end up with a rectangle 25cm x 20cm. We are going to stitch along the very edge of the fabric though so if it’s not too bad, just cut straight to size. You could also dab some Fray Stoppa or similar around the edges if you’re concerned.
  • 1 piece sturdy ribbon or twill, 60cm (approx 23 1/2″) in length and at least 2.5cm (1″) in width.
  • Elastic of a similar width to your ribbon. It needn’t be exact.

What to do:

1. Place your fabric in the middle of the sheet of felt that will be the front of your cover. Just eyeball it. Choose an overlocking-type stitch (or even just a tight zig-zag) on your machine and sew the fabric to the felt.

2. Now, leaving a seam allowance of approximately 1/2cm or 1/4″, sew your front cover to the back.

Case done!

3. Fold each end of your ribbon or twill in 2cm (3/4 “). Fold another 2cm (3/4”) so the messy ends are now effectively hidden and stitch around the square end you’ve created to make it really secure.

4. Sew your elastic to each end of the ribbon to create a loop. Make sure the elastic is slack as you sew it.

The last up-close photo shows you little bits of pilling on the felt and wear on the elastic. Bear in mind though, I have been using this baby non-stop for over 12 months and I take my ipad pretty much everywhere.

Slip your ipad in, slip the ribbon loop over to secure and sigh with contentment. Maybe stroke your pretty little trooper just a bit. Up to you.

As if you won’t.

And if I need tougher protection, I snuggle my snuggly case into this very fab protective case.

It was designed in Italy, made in China and I bought it in New Zealand. So it was well-travelled before I even met it. I love a well-travelled travel companion. This is the brand.

Let me know if you make one my loves.

Personalised ceramic heart necklace

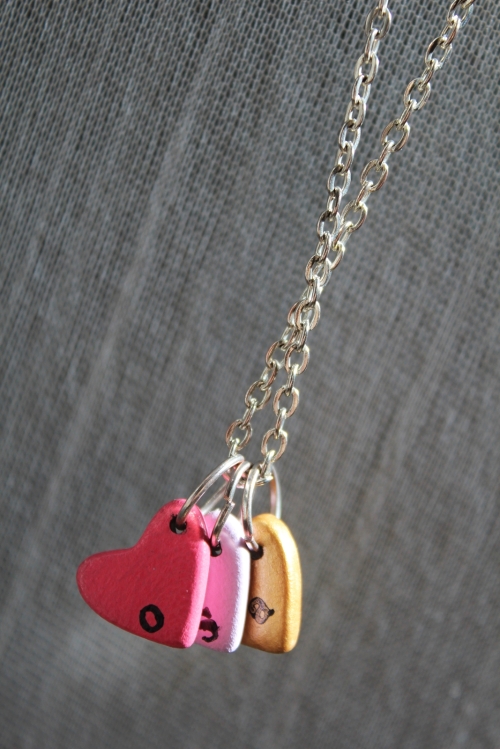
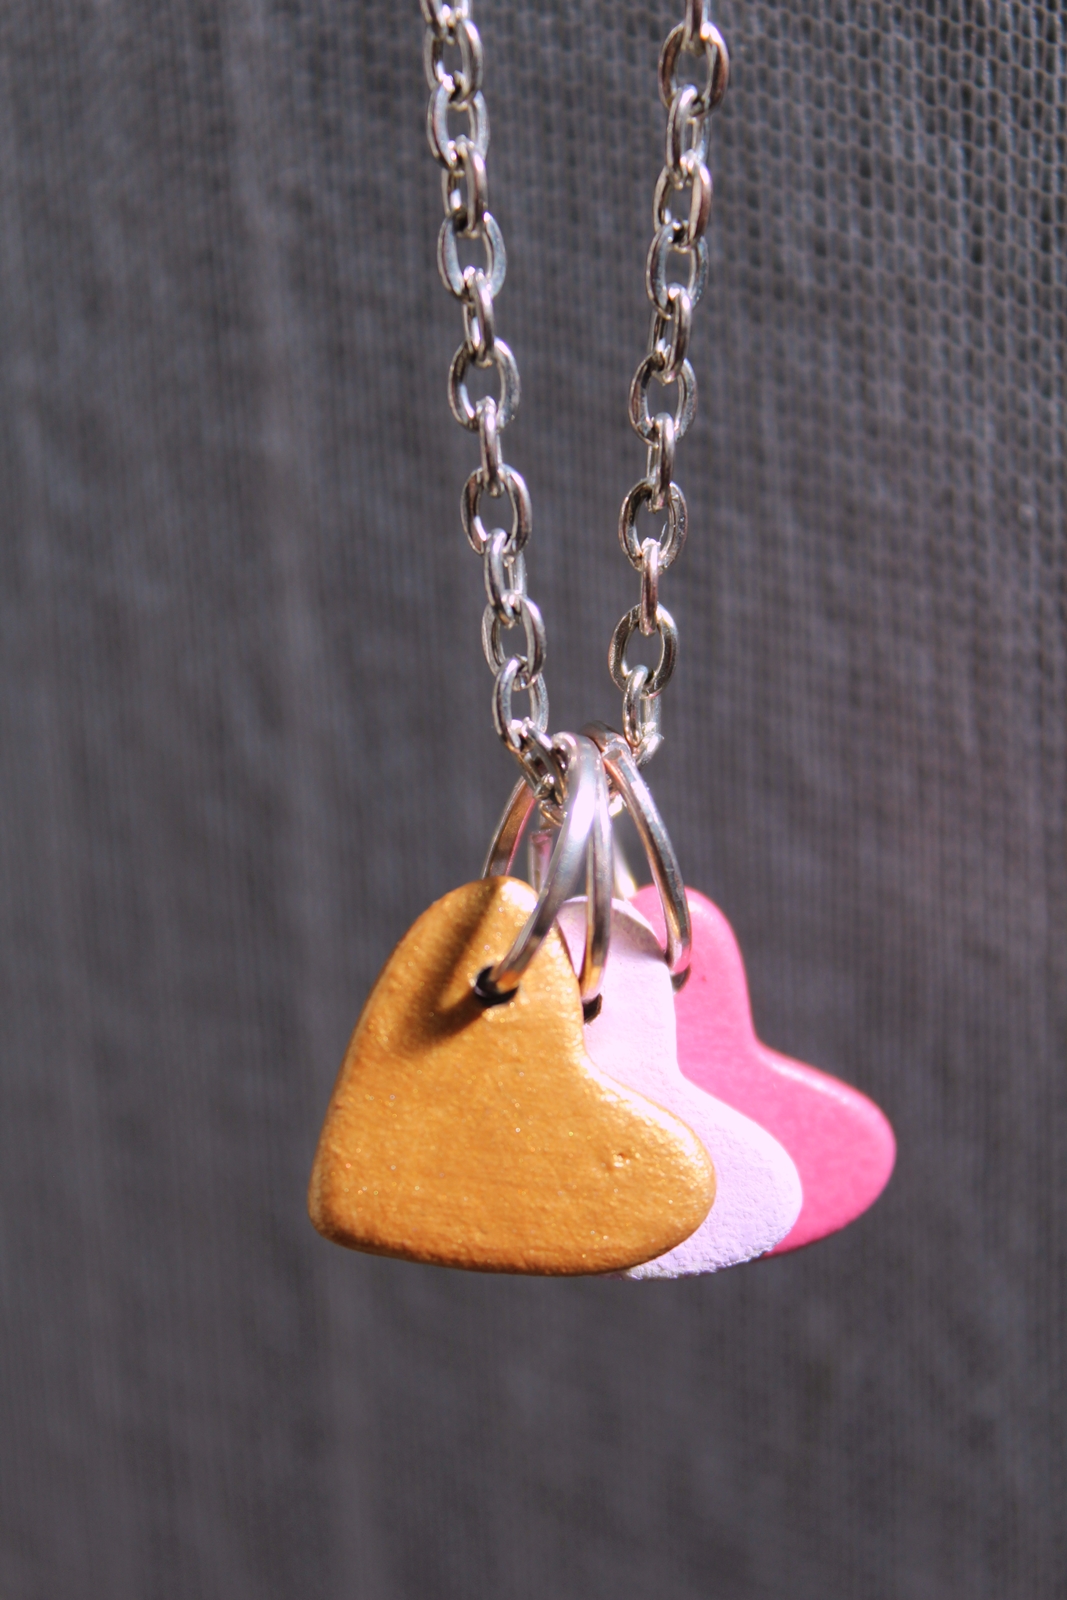
A little while back I made these golden heart necklaces for some young friends. This time I made one for me.

As you may know by now, I have an illness which requires me to personalise everything. At least once.

I painted some more of my little ceramic hearts and this time, added a tiny letter to the back of each – one for each of my beloveds.

After the paint and ink dried, I sprayed each heart with a protective gloss coat (I like this because it’s low odour and non-toxic once dry).

I put a jump ring through each and then strung them on a long chain and I’m really happy with the way the hearts fall back into this lovely line with gold on top each time they move around.

Plus, this way you can keep adding hearts as new beloveds appear.

I love the idea of having my three most precious ones on hearts and close to my heart. And in keeping with my slightly superstitious nature (I rail against it but, really, what’s the harm?) I now refuse to travel without this necklace around my neck.

And my lucky edible undies on.

I’m thinking of making some of these for my girls for Christmas but with their whole names stamped on the back; a different colour for each heart. Surely there will come a time in the future where they look at me with a pleading “for-the-love-of-Gaga-no-more-personalised-crap” look in their eyes. But that day has not yet come my friends. And so, in the meantime, I shall personalise it all on up.

PS: If you’ve a mind to try this, I bought my ceramic hearts from this Etsy shop – I recommend it – the owner is lovely and helpful.