Gilded easter eggs: a tutorial

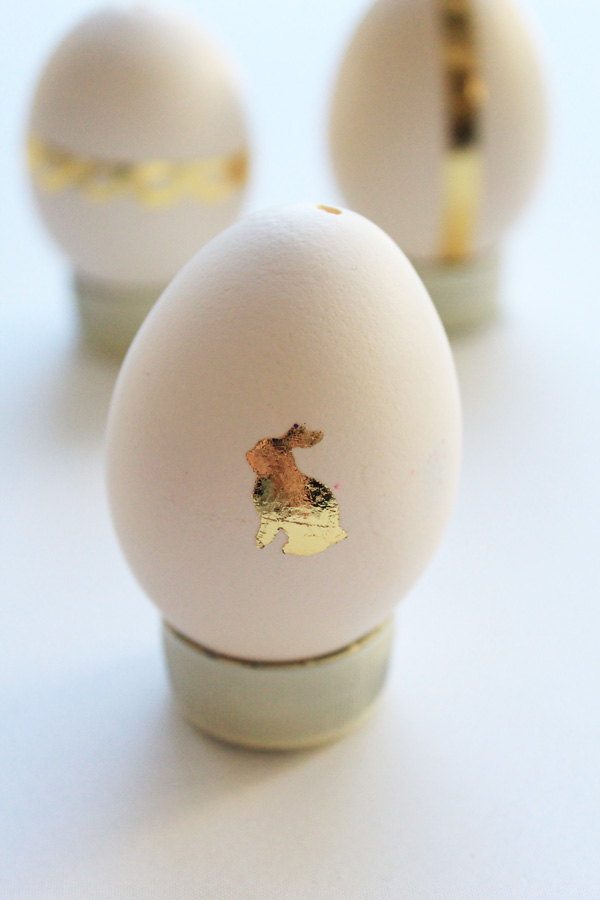
Easter egg decorated with gold foil bunny

What you need:

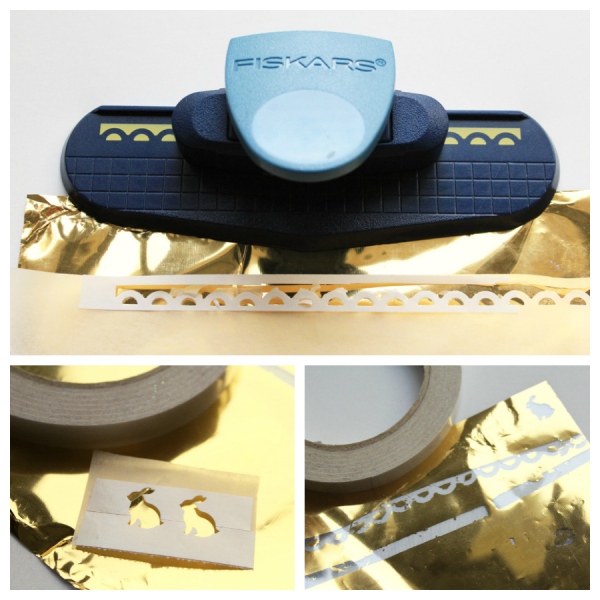
Gold craft foil egg decorating supplies collage

  • Metallic craft foil (I used the one I found at my local craft store, Jones Tones, but there are many brands)
  • Double-sided adhesive tape
  • Eggs

This year I went hunting for white eggs as almost all the eggs you get here, in Melbourne at least, are the brown variety. I tracked some down at the Victoria Market and I’m now obsessed with their creamy, milky purity.

Six 6 white eggs in  carton

Contrary to popular belief, the shells of white eggs are not bleached. White eggs are produced by certain breeds of chook.

What to do:

1. Blow or boil your eggs.

2. Use double-sided tape to create adhesive patterns on your eggs.

3. Rub the dull side of your metallic foil sheet over your sticky bits – or follow the instructions in your pack. Which all sounds vaguely inappropriate but it’s up to you as to how far you want to take that. I am personally known for taking things one step too far so you can guess where I am likely to end up.

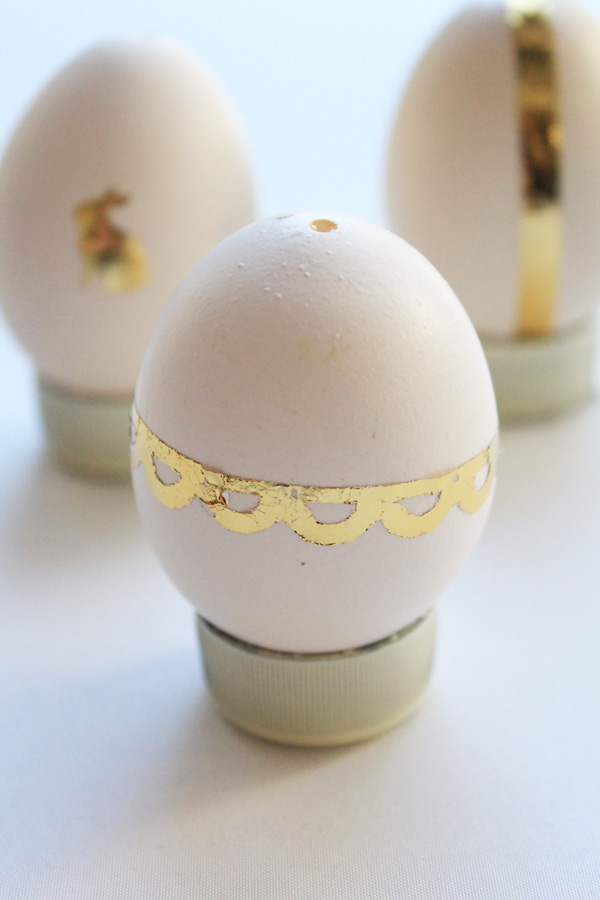
You can use strips of double sided tape applied to baking paper and a paper punch to create tiny bunny stickers as I did in the first photo in the post.

Or for something more ornate, a border paper punch is a little fiddly but creates a beautiful result.

Easter egg decorated with gold scallop design

Or you can just cut strips of your tape to create this simple effect.

Easter egg decorated with gold foil band

However, no matter what method you use, there is no doubt that playdough eggs rolled in glitter produce the most spectacular eggs. As Olive’s creation here attests.


Glitter rolled playdough egg

God, how I love a glittery finger.

Bunny ear headbands: a tutorial

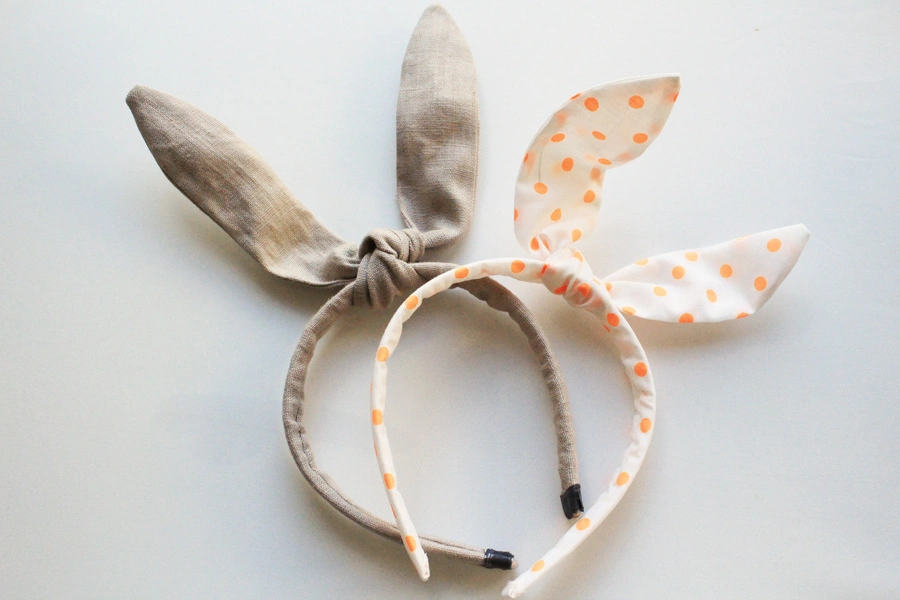
Orange dot and tan linen bunny ear headbands for Easter

I’m not a huge fan of the fluffy bunny ear headbands that abound at Easter but these, my loves, are an entirely different kettle of fish. These I love. These transcend festive timelines and should, nay SHALT, be worn at any time of year.

The beauty of this tutorial is in the simplicity of the wire insert. No need to sew casings, thread wire delicately through small spaces; the fabric alone and the coiled wire I use is enough to get your ears perky but malleable. Not a phrase I thought I would ever write.

What you need:

Supplies for Easter bunny ear headband

  • Fabric – 1/4 metre is plenty.
  • Plastic headband form (1.5cm wide, 38cm around the outside arc).
  • 45cm florist’s wire or other thin, malleable wire.

What to do:

1. Cut the following pieces from your fabric:

a) One rectangle 5cm x 39-40cm.

b) two rectangular pieces 5.5cm x 35cm that will end up looking like this:

Bunny ear headband pattern measurements_edited-1

2. But let’s make our headband cover first.  With right sides of your fabric together, sew the first piece of fabric into a tube using a 3mm seam. I just use the narrow part of my presser foot as a guide i.e. sew keeping the left hand side of the presser foot on the outside edge of your fabric.

3. Turn the tube so that the right side is now on the outside. Turning tubes this narrow can be a bit of a pain. If you’re struggling, this is a good method. I actually have a little device I bought that helps with this process. Any good sewing shop should have one.

Tube of fabric for bunny ear headband

4. Take your two rectangular pieces and lay them right side together. Measure and mark 6cm from one end, then measure and mark 23 cm on from that.

5. From the end of your 23cm long marking, freehand some curvy bunny ears to each end of your fabric rectangle. These don’t have to be perfect (and indeed better if they’re not in my view because you show me a perfect bunny and I’ll show you…well, never mind but I will show you if you want me to) so don’t be too concerned about getting it completely even.

Bunny ear pattern drawn onto fabric strip

6. Cut out 2 of your bunny ear pattern and sew (right side together) using the same 3mm seam allowance, leaving a 5cm gap to turn your fabric right side out.

7.  Once you’ve turned your ears right side out, you might like to gently press them. Or not, if you’re a rough nut like that.

8. At each end of your wire, make a rough coil like this:

Wire insert for bunny ear headbands

When you lay your wire on your turned out bunny ears, the coils should reach about 2/3 of the way towards each end.

9. Insert wire into your ears. You will need to bend it to get it in and then manipulate it straight again once it’s inside.

10. Sew your 5cm gap closed.

11. Slip your thin fabric tube over your headband form and either glue or sew ends closed.

12. Tie on your bunny ears wherever you like ’em. If you’re a lopsided bunny-lover, the world is your oyster at this point.

Fan of the droopy ear?

Tan linen bunny ears headband

I used slightly different measurements for the longer linen ears : 23 cm in the middle and 11cm at each end. Also, I had to wind two pieces of wire together so the insert was long enough.

If your headband form is a different size I think this works as a general rule for covering: measure the width, double it and then add 2cm extra which allows for wriggle room and a 3mm seam allowance.

Orange dot and tan linen bunny ear headbands

Obviously these would look a lot better if I had actual kids to model them but since these are Easter gifts for my girls,  and we are still 3 sleeps out, we will have to make do with these pics sans heads.

orange dot bunny ears headband 2

I’ll update the post after Easter to include photos of  them being worn. If they’re worn. I’m tipping they will be. But then I’ve been wrong in the past. That one time. Just that one time.

We are staying put this Easter and I am looking forward to a quiet long weekend. Does anyone have extra-exciting plans this chocolate-gilded weekend? Please someone tell me they are egg hunting in the gardens of Raffles in Singapore or attending mass at St Peters. Whatever your plans be they modest or grand, travel safely my darlings and, if you do celebrate, Happy Easter. If you don’t, just grab the chocolate anyway yeah?
 

Love and hearts and a bit more love

Pink heart-shaped lamington

My handsome husband never buys me Valentine’s gifts. Which is just the way I like it. I just don’t believe in all the hyped-up commercialism of V-Day. What I do believe in, however, is love. And while I like to shower my peeps in it on any given day, I like positively saturating them on Feb 14th with little tokens to remind them that my love for them runs deeper than Dolly Parton’s cleavage.

Jar of candy hearts

Yep. Deep.

This year I was inspired by a picture I bought ages ago from beautiful Etsy artist Golly Bard.

Jar of Love

Jar of Love hangs in my study and I love it every bit as much as I did when I bought it 4 years ago.

So I made the baby Bettys their own little jars chockfull of love.

Jar of hearts birdseye views

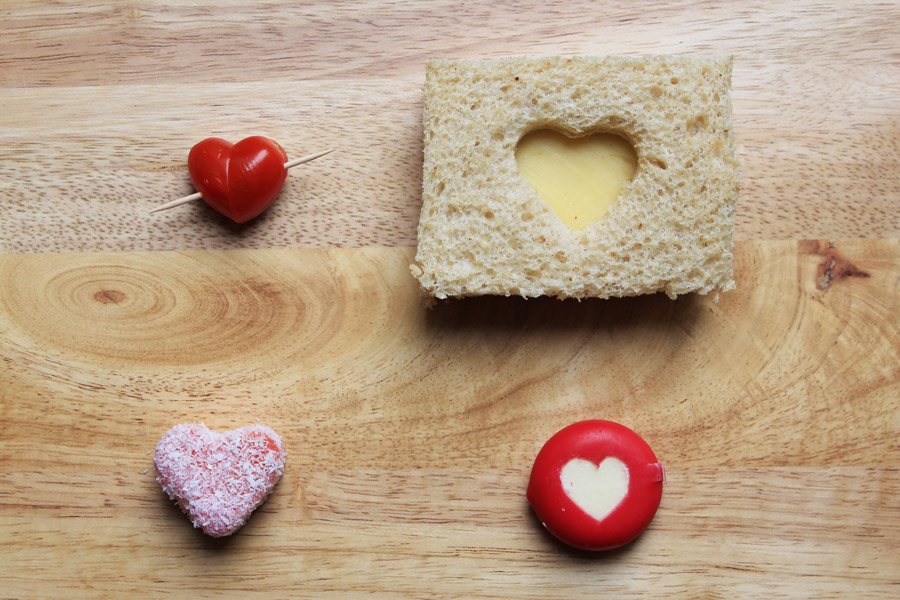
I also like to go totally overboard with their lunches and pack those full of love too. 

Love lunch

Frankly, I defy anyone to tell me that anything says “I love you” more than a pink, heart-shaped lamington.

My grandmother, Betty, used to make these lamos as a treat for us when  we would visit her in the school holidays. We looked forward to them like mad things.

I made this card (from this Photojojo tutorial) for my most handsome of husbands. It’s a shot from our wedding in Bali.

Valentine's card with cut-out heart

I love that pic however, in a startling coincidence, I do appear to be sporting horrifyingly over-sculpted eyebrows very similar to those of a certain infamous Australian who has just been released from a Balinese prison this week.  Well, at least I have the excuse that it was 2001.

I hope your Valentine’s Day and life in general is brimming with that many splendoured thing.

jar of hearts with hearts spilling out

Last Christmassy bits

Top of Christmas cake

The ham is all but finished, the tree is swiftly desiccating, the presents have been well and truly played with and we have travelled a scenic coastal route for about 1300 kms in the last few days to be in Sydney with dear friends for New Year’s Eve.

I do loves me a brand spanking new year. A fresh slate, endless opportunities and possibilities. Makes me itch with anticipation.

Just before 2013 dissolves into a shiny new dawn, I did just want to show you the last Christmas-related bits.

We had our big family Christmas on Christmas Eve this year which may well become a new thing for us as it leaves Christmas Day to really relax. It felt kind of European and somehow extra Christmassy and there’s nothing like a twinkling light or two and flickering candle to really up the atmosphere.

We did the whole shebang: 8 kilo turkey and whole leg of ham with all the trimmings. The ham was, if I do say so myself, spectacular this year. I brought it to a festive sheen with a quince paste, honey and mustard glaze. Delish.

whole baked ham with calico handle

My mum always makes Christmas cakes and plum pudding to an old family recipe. This year I decorated the top of our cake with the cutest snowman ever (made by Sophia a couple of Christmases ago), some paint chip pine trees (the colour, appropriately, “fir green”) and a sprinkling of icing sugar snow.

Christmas cake with snowman and pine trees

This was one of the most treasured gifts this year: a new blankie. Think she likes it?

Olive with her blankie

Despite the slightly Euro feel to this year’s celebrations, we went with an Australian bush Christmas theme for the table eating. Mum and I spray-painted gum leaves and gum nuts silver which combined with the minty greens and coral of fresh gum and blossoms made a beautiful centre-piece.

Gum tree Christmas table centre piece

The girls made gifts for each other and this year Sophia’s form Olive was, well, unintentionally hilarious.

The only thing Olive loves more than baby dolls is the thought of herself as a baby. So we combined the two. I printed a photo of Olive’s baby face onto some fabric and then Sophia drew in the other details. After that we cut it out, I sewed it together and Sophia stuffed it. I should have left a slightly larger seam allowance around the head of the doll. Because this is not what Olive looked like as a babe!

Olive doll sibling present

The irony is that her head was more like a pumpkin than this pin-headed weirdo would have you believe.

From this angle she looks slightly closer to herself. But still like an alien.

Olive doll

I made a desultory attempt to talk Soph into us making another but she was happy with it. And, more importantly, as the next photo attests, Olive was delighted. I love the way Soph is looking at her to gauge her reaction.

Olive opening her sibling present

Olive did remarkably well despite her enormous cast in decorating this mug for her big sister using ceramic pens. Sophia fancies herself quite the tea drinker (even though the tea is never actually consumed in any vaster quantities than a sip or two) so she was thrilled to have her very own cup for that purpose.

Sophia's sibling present mug

Last of all, I wanted to show you these sweet little panforte. A heavily spiced dense cake, I used to overdose on these regularly when we lived in Italy. This was my first go at making them myself and they worked beautifully. And my kitchen smelled like Christmas on a stick from grinding all the fresh spices: whole nutmeg, cinnamon sticks, cardamom seeds and vanilla pods.

Panforte

Panforte in little cake tin

wrapped this one as a gift for a girlfriend and put it on the Christmas-set the table just to get quick shot but next year I think I might try to make a heap of these in advance and use them as take-home place settings. Tell her she’s dreaming….sighs a voice in the background!

Homemade panettone

See you on the flip side my darlings. Have a fabulous start to 2014.

Christmases past

First living wreath

Every year I do it. Get over-excited. Plan too much. End up feeling a bit less jolly and a bit more postal.

Edge of fabric cracker

Not doing it this year.

Gingerbread house - front view

I do have a few things planned – I mean a girl can’t just go cold Christmas turkey now can she?

Christmas drinks invitations and Christmasy polar bear

But mainly I’m just trying to be present. In each moment. And yes, I know how trite that sounds but I am still committed to doing it because I think it is worthwhile.

Cream velvet bow on golden Christmas tree decoration

And my window of opportunity to have little girls looking at the Elf on the Shelf in wonder is swiftly closing.

Christmas Tea light, vintage bauble and shelf elf

In fact, the older one already maintains that she’s sure the elf comes from Ebay and not the North Pole.

Close-up of jingle bells on Olive's stocking

You have to believe to receive, I say. And that puts paid to her scepticism. Out loud, at least.

Cracker

In the meantime I’ve been looking back through some of my posts from past Christmases. I’m re-posting some of my favourite projects and hope they might give you some festive inspiration…or just provide a bit of xmas eye-candy at the very least.

Christmas Card - bunting

Click on the “Christmas ” in the righthand sidebar to see all these and many more Christmas posts. There aren’t really tutorials for most of these but if you want any details , drop me an email (on the contacts page above) and I’ll be very happy to oblige you with  a quick set of instructions.

Christmas candy cane lollipps

I love the wintery-ness of a Northern hemisphere Christmas. Which is completely at odds with the searing heat of antipodean celebrations.

Tolkien's Father Christmas Letters - Polar Bear's Accident

Don’t get me wrong, I relish everything about an Australian Christmas but I simply cannot help but emblazon things with snowflakes. Feels so wrong and yet I can’t stop.  Christmas crack.

Jube wreath close up with description

This cosy Christmas in July was a natural progression for one so taken with the thought of roaring fires and snow-trimmed windows.

Christmas table by candlelight

There’s a white Christmas in our near future. I feel it in me waters.

Starlight mint bauble with description

What about you, my darlings. Grand Christmas project plans? I love to live vicariously so let me know in the comments if you feel inclined. Oh go on, do.

Starlight mint LED lights

Sewing for the tropics

Back of Soph's Liberty Jumpsuit

I love saying “the tropics”.  Puts me in mind of Joseph Conrad novels and Frederic Church paintings.

As usual, I went into a frenzy of sewing clothes for the kids just prior to our recent trip to Bali. I don’t know what possesses me but it happens in the lead up to nearly every single one of our annual holidays.

Soph in jumpsuit seated

This time the urge bit me even harder than usual and I wonder whether the meditative qualities of sewing were a way for me to calm my mind in anticipation of our return after so long. Well whatever the motivation, it worked and everyone won: I felt calm (ish) and the kids got some new duds. Which, because they’re still tiny poppets, they wore not only without complaint but with some excitement. Making the most of that window.

I made countless pairs of simple shorts but the slightly more involved items this year were this jumpsuit (or romper):

Close-up Soph's Liberty jumpsuit

and these linen pants.

Soph in flat fronted white linen pants

I bought this beautiful Liberty fabric from the Liberty department store when I was in London in July. From the moment I saw it on the bolt in that venerable establishment, I envisaged a jumpsuit.

Liberty tana lawn fabric

So its fate was sealed and, luckily for me, there was an excellent tutorial for just such a suit.

This was a slightly more complicated project than I usually commit to (pleats at the front etc) but the tutorial is so good that there was only minimal swearing involved. I wish I could tell you it was under my breath.

Profanities aside, Sophia and I were delighted with the outcome.

Soph in Liberty jumpsuit

Of course, as you all probably already know, it is actually illegal to travel to the tropics without a pair of white linen pants and far be it from me to flout the immutable laws of the land.

I used a pattern for shorts that I bought from here (and highly recommend – it’s simple to make your own but this saves time and has some really gorgeous variations) to make the pants, just extending the legs myself, hoping for the best. Turned out okay, thank Gaga, as the linen was $30 per metre.

I also used this very useful tutorial to insert simple pockets into the pants, the addition of which  I found ridiculously exciting. As did my model.

Flat front white linen pants

Check out the modelling face on this one will you?

Soph in white linen pants

And here she is strutting the moss-covered catwalk.

Sophia gif 2

I do truly love a linen pant. Almost as much I love saying “pant” in the singular.

Painted wooden serving boards: a tutorial

small aqua ended cheese board gold knife on angle

Last Christmas my brother gave me Jamie Oliver’s latest cookbook: ” Jamie’s 15 minute meals”.  It both inspired and perplexed me.

Blue cheese platter close up

I was  inspired by the painted serving boards in the book but perplexed by the notion that anyone could complete some of the recipes in there in 15 minutes.

Edge of red edge cheese platter

Achievability of the food within aforementioned time limit aside, I’m here to tell you these painted wooden boards (if not Jamie’s recipes) whip up in under 15 minutes. Well, the first coat, anyway. Okay, so maybe don’t start these at a quarter to I’ve-got-to-be-somewhere.  Twenty to should be plenty though!

Pile of 3 wooden cheese boards

Once again, I’ve employed my very favourite masking tape and paper punch stencil method…

Wooden cheese platter board painters tape stencil

with much success.

Painted wooden cheese board blue dots

I hesitated to call this a tutorial as (with so many of my thangs) it really is criminally simple but I’m going to go ahead and do that anyway because I’m badass like that.

Small aqua edged cheese platter gold knife below

What you need:

  • Wooden serving board, cheese board, platter. Whatever takes your fancy. Do ensure it is not treated ie, safe to serve food on.
  • Food safe paint.
  • Painter’s tape or good quality masking tape

I got my food safe paint from ecolour paints.  I highly recommend them. They were lovely to deal with on the phone and very helpful despite the fact I was only ordering sample-sized quantities of paint. You  only need a small amount for this project and 0.5 litre typically costs AUS$13. Pretty decent I think.

Eco colour paint pots

I’m sorry I can’t give you international suppliers but I’m sure a google search in your area would lead you to what you want.

Blue cheese platter with walnuts, olives, quince paste, brieThe other thing I truly LOVE about this company is they can mix up any colour at all. You just choose the paint swatch you want and let them know the brand and name of the colour.

Aqua stripe cheese platter

What to do:

1. Paint your wood.

You can use steel wool to rough it up for a distressed look once it’s dry. Or use painter’s masking tape to create stripes and perfect straight lines. And use your paper punch to make templates. Endless possibilities.

Painted wooden platter in progress masking tape

I am making some of these for Christmas gifts this year. I think a board along with a beautiful cheese knife or even a round of cheese and some quince paste makes a beautiful Christmas present.

Red edged cheese platter closer

I collected my boards from various spots including IKEA and the local supermarket. The olives, however, are our backyard 2013 crop. Salty little bastards but I love ’em. Quince paste is mine too. Satisfying to have two homemade comestibles on the one platter.

Homemade olives

And don’t feel limited to cheese. I had a party last night and served a pile of homemade brownies on some of these boards. If you can put it on a platter, you can put it on one of these.

Red-edged painted wooden cheese board

Acqua stripe cheese board close up

PS: I’ve updated the look of my blog. I struggled to let go of my twirling chick on horseback but I’m much happier with the cleaner feel of this new design. Also, for a long time I’ve wanted a theme that  showcases my photographs better. They’re now bigger (in the horizontal view) and, I hope, better for that fact. Whaddya think?

Homemade edible confetti: a tutorial

Edible cake confetti 5

Edible confetti. What’s not to love.

edible cake confetti 4

After I had the idea I googled it and it turns out you can actually buy this stuff. Hence the “homemade” in the title of this post. But making it yourself means you can control the colours and the additives. And spend time when you should otherwise be doing mundane housework enjoying the meditative qualities of kneading fondant icing and flexing your punching muscles.

Edible confetti on cake on white stand

What you need:

  • Fondant icing (I use Orchard brand, available in large supermarkets here).
  • Gel food colouring (I use Americolour and Wiltons brands).
  • Icing sugar and a sieve
  • Baking paper
  • Paper punch (a handheld circular punch works best for this project)
  • Rolling pin
  • Cake cooling rack (good but not essential).

Edible confetti on cake 1

What to do:

1. Start by sifting some icing sugar through your sieve onto a corner of your workspace. Make a little pile of it. You’ll use this to dry the fondant out a bit as you knead it.

2. Tear off a golf-ball sized piece of fondant and knead until smooth and pliable. If it is too sticky, add some sieved icing sugar.

3. Add a drop or two of food colouring. These gel colours are very intense and you only need a little. Better to add a little and more as needed.

4. Knead the colour through the icing until it is even, adding icing sugar as you go to keep it soft but not sticky. It tolerates quite a lot of icing sugar being added without compromising the texture or colour so don’t be afraid to add a fair bit if required.

5. Roll out your ball of fondant as thinly as you can between two sheets of baking paper. It doesn’t have to be paper-thin – just thin enough to get into the paper punch.

Green fondant icing rolled out

Peel your flattened fondant off the paper and place on another piece of baking paper on a tray to dry for a few hours. When it is dry and you can lift the whole thing off the paper without it drooping too much, transfer it to a cake cooling rack if you have one to let the air get to all sides of it. If not, just leave it on the tray and allow to dry for 24 hours.

Once the icing is stiff enough, get punching.

Icing with paper punch

Try not to do this:

Edible confetti on my fingers

That’s it.

I am loving how this looks. Quite “spectacleear”, as my 4 year old would say.

Edible cake confetti 2

And there you were thinking your paper punches were limited to use with paper, washi tape, masking tape, soap and fabric. Oh, you!

This is a post in twirling betty’s paper punch-a-palooza series. If you enjoyed it, you might also like:

1. Paper punch stencils

2. Paper punch fabric luggage tags

3. Paper punch washi tape stickers

4. Paper punch fabric confetti

4. Paper punch sparkly snowflake envelope

5. Paper punch soap confetti

6. Paper punch washi tape cake stand decoration

7. Paper punch stencilling on clothes with masking tape or freezer paper

Large paper punch-a-palooza series header

A singlet for a new babe and a dotty bag.

Love heart singlet close up

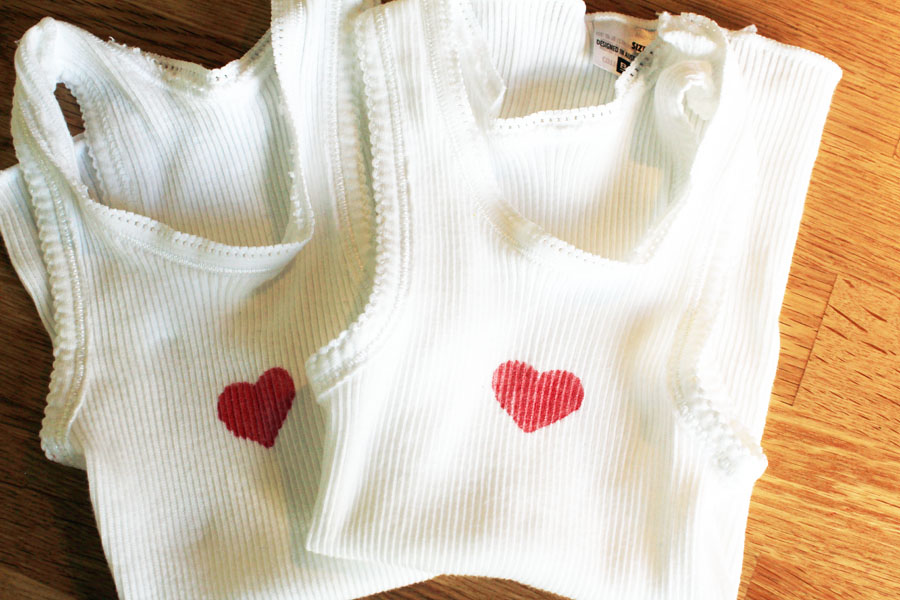
A lovely friend of mine recently had a little girl and I made her a weeny heart singlet for her new love.

Baby singlets kill me.

Love heart singlets

I love the way tiny babes look like shearers in them. Heart singlets are sweeping the shearing sheds of Australia this year, by the way.

I have touched on using paper punches as a stencil in this earlier paper punch-a-palooza post, but it’s always worth coming back to because it’s such a quick but satisfying way to get  templates onto fabric.

You can either punch through freezer paper, or if you don’t have that, use painter’s masking tape on baking paper. It can be a bit trickier to line up strips of tape and so on but generally works equally well.

Freezer paper and masking tape stencils

Also, a little tip: if your punch is not, like our friend Kanye West, the sharpest tool in the shed, place your masking tape and baking paper between two sheets of normal paper and then punch. Your paper. Not your partner. I cannot condone domestic violence.  No matter how many times they try to make you watch Top Gear.

I didn’t need to do that with the smaller heart punch, but my big circular one struggled. These are the stencils I made with the latter.

Masking tape stencils on bag

And the finished product.

Spring in a bag

It’s a Springy bag, I feel. Perfect for market trips to collect the ingredients for my favourite Spring dish.

I was cavalier with my application of paint on my teeny singlets (because that’s how I roll) and, interestingly, the masking tape made for a marginally sharper outline.  I did not expect that. Indeed, I imagine my feelings were very similar indeed to Louis Pasteur’s as each chicken recovered. Very similar indeed. And I don’t want to get too cocky, but I am preeeety sure that my results might have an even larger effect than Louis’ eventual discovery of penicillin. You heard it here first.

Love heart singletThis is a post in twirling betty’s Paper Punch-a-palooza series.

Lilac large paper punch-a-palooza series header

If you enjoyed this post, you might like the other in the Paper-punch-a-palooza series.

If this has got you in the mood to crack out your supplies and punch something  – and then pull our your paper punches and make stuff  – then you might be inspired by these other posts in the series:

1. Paper punch stencils

2. Paper punch fabric luggage tags

3. Paper punch washi tape stickers

4. Paper punch sparkly snowflake envelope

5. Paper punch soap confetti

6. Washi tape cake stand border

Slumber party

name pillowcases

We are at the end of a weekend-long festival of 8-year-old-ness. As always, I am in total denial that we are even at this point. I mean how can it be the case when I’m pretty sure I was in labour with her not much more than a year ago?

We had 7 little people here for a slumber party last night (including the birthday girl and her little sister who felt very grown up indeed to be hangin’ with the big girls) and they were all, without exception, edible.

There was a special at-request birthday dinner of rigatoni carbonara and apple pie then a snuggle under piles of doonas while they avidly watched Roald Dahl’s ‘The BFG’.

Personalised pillow cases

We served Snozzcumbers  – hollowed out cucumbers stuffed with smoked salmon and cream cheese and decorated with poppy seeds and popcorn – and Frobscuttle – lemonade dyed green and purple  – at the corresponding points through the movie which went down a treat.

I am totally serving Snozzcumbers at my next grown-up party. They were genuinely delicious.

The best bit was when Sophia’s friends voted (unanimously apart from the birthday girl  I might add) to see a dance routine from her father and I.  We did, if I do say so myself, outdo ourselves. Thanks must also go to Christina Aguilera and Pittbull.  I have literally been building up to that moment my entire parenting life and it was well worth the wait.

It was Sophia’s idea to make a pillowcase for each person and these whipped up in under an hour with some t-shirt transfer paper and a hot iron.  Another magic trifecta craft: quick, easy and effective.

Pillowcases with names

I have two little babes sleeping very soundly at this moment.  And possibly having nightmares about their parents’ dance moves. Potentially scarring stuff that.