Gilded easter eggs: a tutorial

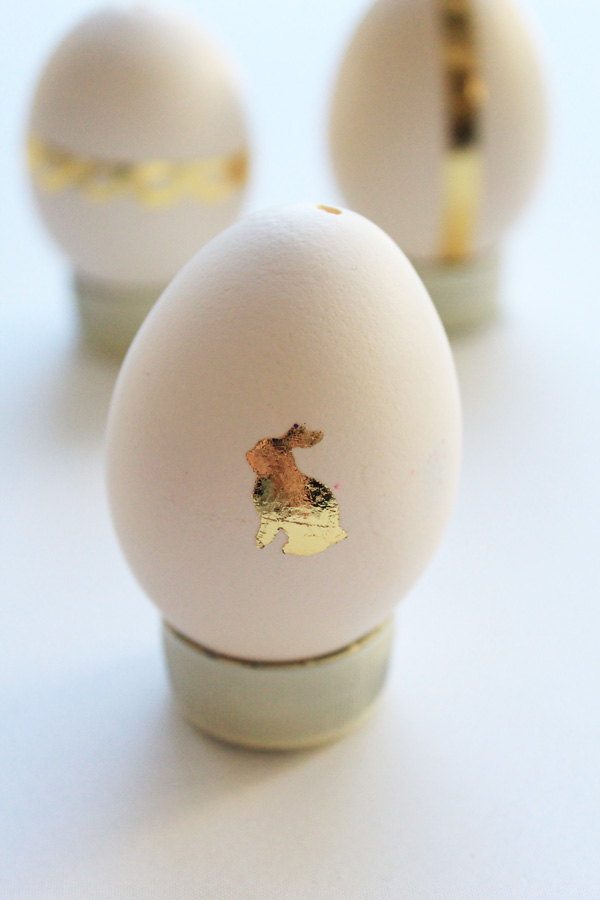
Easter egg decorated with gold foil bunny

What you need:

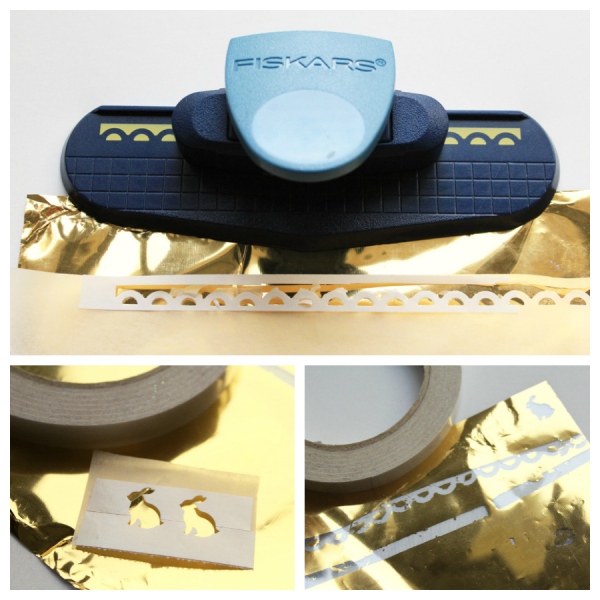
Gold craft foil egg decorating supplies collage

  • Metallic craft foil (I used the one I found at my local craft store, Jones Tones, but there are many brands)
  • Double-sided adhesive tape
  • Eggs

This year I went hunting for white eggs as almost all the eggs you get here, in Melbourne at least, are the brown variety. I tracked some down at the Victoria Market and I’m now obsessed with their creamy, milky purity.

Six 6 white eggs in  carton

Contrary to popular belief, the shells of white eggs are not bleached. White eggs are produced by certain breeds of chook.

What to do:

1. Blow or boil your eggs.

2. Use double-sided tape to create adhesive patterns on your eggs.

3. Rub the dull side of your metallic foil sheet over your sticky bits – or follow the instructions in your pack. Which all sounds vaguely inappropriate but it’s up to you as to how far you want to take that. I am personally known for taking things one step too far so you can guess where I am likely to end up.

You can use strips of double sided tape applied to baking paper and a paper punch to create tiny bunny stickers as I did in the first photo in the post.

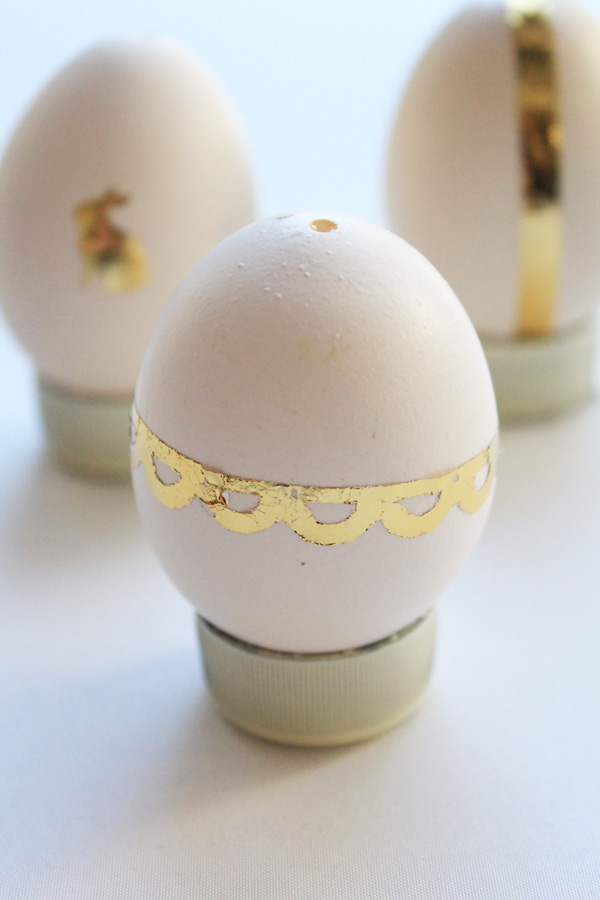
Or for something more ornate, a border paper punch is a little fiddly but creates a beautiful result.

Easter egg decorated with gold scallop design

Or you can just cut strips of your tape to create this simple effect.

Easter egg decorated with gold foil band

However, no matter what method you use, there is no doubt that playdough eggs rolled in glitter produce the most spectacular eggs. As Olive’s creation here attests.


Glitter rolled playdough egg

God, how I love a glittery finger.

Bunny ear headbands: a tutorial

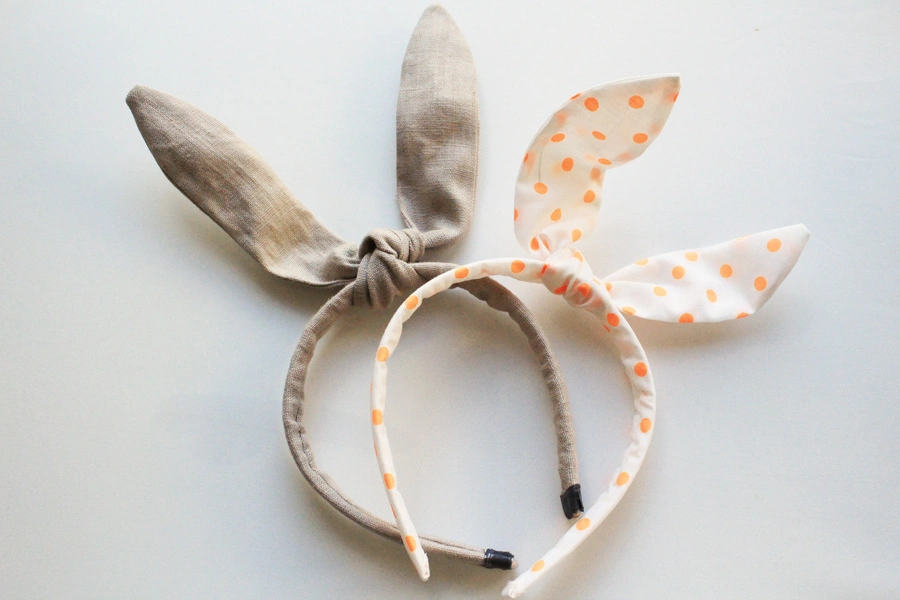
Orange dot and tan linen bunny ear headbands for Easter

I’m not a huge fan of the fluffy bunny ear headbands that abound at Easter but these, my loves, are an entirely different kettle of fish. These I love. These transcend festive timelines and should, nay SHALT, be worn at any time of year.

The beauty of this tutorial is in the simplicity of the wire insert. No need to sew casings, thread wire delicately through small spaces; the fabric alone and the coiled wire I use is enough to get your ears perky but malleable. Not a phrase I thought I would ever write.

What you need:

Supplies for Easter bunny ear headband

  • Fabric – 1/4 metre is plenty.
  • Plastic headband form (1.5cm wide, 38cm around the outside arc).
  • 45cm florist’s wire or other thin, malleable wire.

What to do:

1. Cut the following pieces from your fabric:

a) One rectangle 5cm x 39-40cm.

b) two rectangular pieces 5.5cm x 35cm that will end up looking like this:

Bunny ear headband pattern measurements_edited-1

2. But let’s make our headband cover first.  With right sides of your fabric together, sew the first piece of fabric into a tube using a 3mm seam. I just use the narrow part of my presser foot as a guide i.e. sew keeping the left hand side of the presser foot on the outside edge of your fabric.

3. Turn the tube so that the right side is now on the outside. Turning tubes this narrow can be a bit of a pain. If you’re struggling, this is a good method. I actually have a little device I bought that helps with this process. Any good sewing shop should have one.

Tube of fabric for bunny ear headband

4. Take your two rectangular pieces and lay them right side together. Measure and mark 6cm from one end, then measure and mark 23 cm on from that.

5. From the end of your 23cm long marking, freehand some curvy bunny ears to each end of your fabric rectangle. These don’t have to be perfect (and indeed better if they’re not in my view because you show me a perfect bunny and I’ll show you…well, never mind but I will show you if you want me to) so don’t be too concerned about getting it completely even.

Bunny ear pattern drawn onto fabric strip

6. Cut out 2 of your bunny ear pattern and sew (right side together) using the same 3mm seam allowance, leaving a 5cm gap to turn your fabric right side out.

7.  Once you’ve turned your ears right side out, you might like to gently press them. Or not, if you’re a rough nut like that.

8. At each end of your wire, make a rough coil like this:

Wire insert for bunny ear headbands

When you lay your wire on your turned out bunny ears, the coils should reach about 2/3 of the way towards each end.

9. Insert wire into your ears. You will need to bend it to get it in and then manipulate it straight again once it’s inside.

10. Sew your 5cm gap closed.

11. Slip your thin fabric tube over your headband form and either glue or sew ends closed.

12. Tie on your bunny ears wherever you like ’em. If you’re a lopsided bunny-lover, the world is your oyster at this point.

Fan of the droopy ear?

Tan linen bunny ears headband

I used slightly different measurements for the longer linen ears : 23 cm in the middle and 11cm at each end. Also, I had to wind two pieces of wire together so the insert was long enough.

If your headband form is a different size I think this works as a general rule for covering: measure the width, double it and then add 2cm extra which allows for wriggle room and a 3mm seam allowance.

Orange dot and tan linen bunny ear headbands

Obviously these would look a lot better if I had actual kids to model them but since these are Easter gifts for my girls,  and we are still 3 sleeps out, we will have to make do with these pics sans heads.

orange dot bunny ears headband 2

I’ll update the post after Easter to include photos of  them being worn. If they’re worn. I’m tipping they will be. But then I’ve been wrong in the past. That one time. Just that one time.

We are staying put this Easter and I am looking forward to a quiet long weekend. Does anyone have extra-exciting plans this chocolate-gilded weekend? Please someone tell me they are egg hunting in the gardens of Raffles in Singapore or attending mass at St Peters. Whatever your plans be they modest or grand, travel safely my darlings and, if you do celebrate, Happy Easter. If you don’t, just grab the chocolate anyway yeah?
 

Painted wooden serving boards: a tutorial

small aqua ended cheese board gold knife on angle

Last Christmas my brother gave me Jamie Oliver’s latest cookbook: ” Jamie’s 15 minute meals”.  It both inspired and perplexed me.

Blue cheese platter close up

I was  inspired by the painted serving boards in the book but perplexed by the notion that anyone could complete some of the recipes in there in 15 minutes.

Edge of red edge cheese platter

Achievability of the food within aforementioned time limit aside, I’m here to tell you these painted wooden boards (if not Jamie’s recipes) whip up in under 15 minutes. Well, the first coat, anyway. Okay, so maybe don’t start these at a quarter to I’ve-got-to-be-somewhere.  Twenty to should be plenty though!

Pile of 3 wooden cheese boards

Once again, I’ve employed my very favourite masking tape and paper punch stencil method…

Wooden cheese platter board painters tape stencil

with much success.

Painted wooden cheese board blue dots

I hesitated to call this a tutorial as (with so many of my thangs) it really is criminally simple but I’m going to go ahead and do that anyway because I’m badass like that.

Small aqua edged cheese platter gold knife below

What you need:

  • Wooden serving board, cheese board, platter. Whatever takes your fancy. Do ensure it is not treated ie, safe to serve food on.
  • Food safe paint.
  • Painter’s tape or good quality masking tape

I got my food safe paint from ecolour paints.  I highly recommend them. They were lovely to deal with on the phone and very helpful despite the fact I was only ordering sample-sized quantities of paint. You  only need a small amount for this project and 0.5 litre typically costs AUS$13. Pretty decent I think.

Eco colour paint pots

I’m sorry I can’t give you international suppliers but I’m sure a google search in your area would lead you to what you want.

Blue cheese platter with walnuts, olives, quince paste, brieThe other thing I truly LOVE about this company is they can mix up any colour at all. You just choose the paint swatch you want and let them know the brand and name of the colour.

Aqua stripe cheese platter

What to do:

1. Paint your wood.

You can use steel wool to rough it up for a distressed look once it’s dry. Or use painter’s masking tape to create stripes and perfect straight lines. And use your paper punch to make templates. Endless possibilities.

Painted wooden platter in progress masking tape

I am making some of these for Christmas gifts this year. I think a board along with a beautiful cheese knife or even a round of cheese and some quince paste makes a beautiful Christmas present.

Red edged cheese platter closer

I collected my boards from various spots including IKEA and the local supermarket. The olives, however, are our backyard 2013 crop. Salty little bastards but I love ’em. Quince paste is mine too. Satisfying to have two homemade comestibles on the one platter.

Homemade olives

And don’t feel limited to cheese. I had a party last night and served a pile of homemade brownies on some of these boards. If you can put it on a platter, you can put it on one of these.

Red-edged painted wooden cheese board

Acqua stripe cheese board close up

PS: I’ve updated the look of my blog. I struggled to let go of my twirling chick on horseback but I’m much happier with the cleaner feel of this new design. Also, for a long time I’ve wanted a theme that  showcases my photographs better. They’re now bigger (in the horizontal view) and, I hope, better for that fact. Whaddya think?

Homemade edible confetti: a tutorial

Edible cake confetti 5

Edible confetti. What’s not to love.

edible cake confetti 4

After I had the idea I googled it and it turns out you can actually buy this stuff. Hence the “homemade” in the title of this post. But making it yourself means you can control the colours and the additives. And spend time when you should otherwise be doing mundane housework enjoying the meditative qualities of kneading fondant icing and flexing your punching muscles.

Edible confetti on cake on white stand

What you need:

  • Fondant icing (I use Orchard brand, available in large supermarkets here).
  • Gel food colouring (I use Americolour and Wiltons brands).
  • Icing sugar and a sieve
  • Baking paper
  • Paper punch (a handheld circular punch works best for this project)
  • Rolling pin
  • Cake cooling rack (good but not essential).

Edible confetti on cake 1

What to do:

1. Start by sifting some icing sugar through your sieve onto a corner of your workspace. Make a little pile of it. You’ll use this to dry the fondant out a bit as you knead it.

2. Tear off a golf-ball sized piece of fondant and knead until smooth and pliable. If it is too sticky, add some sieved icing sugar.

3. Add a drop or two of food colouring. These gel colours are very intense and you only need a little. Better to add a little and more as needed.

4. Knead the colour through the icing until it is even, adding icing sugar as you go to keep it soft but not sticky. It tolerates quite a lot of icing sugar being added without compromising the texture or colour so don’t be afraid to add a fair bit if required.

5. Roll out your ball of fondant as thinly as you can between two sheets of baking paper. It doesn’t have to be paper-thin – just thin enough to get into the paper punch.

Green fondant icing rolled out

Peel your flattened fondant off the paper and place on another piece of baking paper on a tray to dry for a few hours. When it is dry and you can lift the whole thing off the paper without it drooping too much, transfer it to a cake cooling rack if you have one to let the air get to all sides of it. If not, just leave it on the tray and allow to dry for 24 hours.

Once the icing is stiff enough, get punching.

Icing with paper punch

Try not to do this:

Edible confetti on my fingers

That’s it.

I am loving how this looks. Quite “spectacleear”, as my 4 year old would say.

Edible cake confetti 2

And there you were thinking your paper punches were limited to use with paper, washi tape, masking tape, soap and fabric. Oh, you!

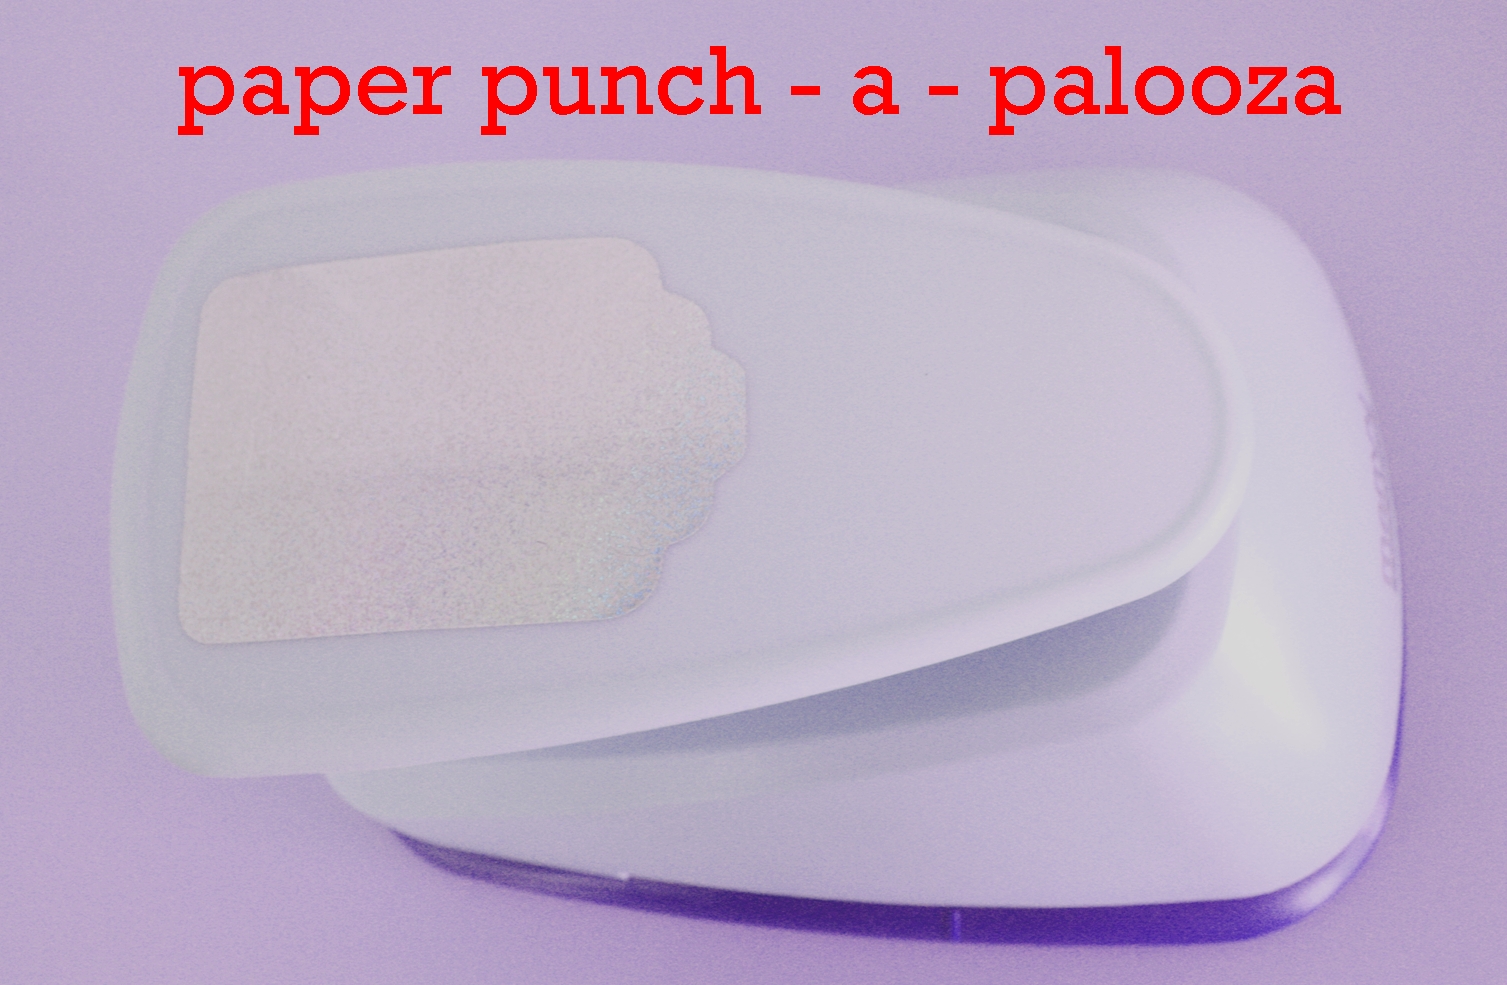
This is a post in twirling betty’s paper punch-a-palooza series. If you enjoyed it, you might also like:

1. Paper punch stencils

2. Paper punch fabric luggage tags

3. Paper punch washi tape stickers

4. Paper punch fabric confetti

4. Paper punch sparkly snowflake envelope

5. Paper punch soap confetti

6. Paper punch washi tape cake stand decoration

7. Paper punch stencilling on clothes with masking tape or freezer paper

Large paper punch-a-palooza series header

Decorating clothes with free motion sewing: a tutorial

Daisy top for Daisy

It’s been babypalooza around here. No, I have not been delivered of any more of my own (“delivered of” – love that phrase,  used most recently by Buck Palace to announce bonny Prince George’s arrival), but friends and family are popping them out all over the place.

Most recently, my darling brother-in-law and his bewdiful wife had a baby girl.

To celebrate I made her this little top using the free sewing technique I’ve talked about before when I made these napkins, and these personalised paper gift bags.

Now as you can see, this is not a neat and perfect art. By its very definition free motion sewing gives a sketchy, scribbly look which I adore but won’t be everyone’s cup of tea.

Close-up free-motion Daisy

But if it is, then that is awesome on a stick and here’s a little how-to.

What you need:

  • Garment to sew onto (duh!)
  • Free motion sewing foot
  • Eraser pen for fabric
  • Your design.

What to do:

1. Print your design onto paper and trim it down so you can slip it under your garment.

2. Trace the design using your eraser pen. If the fabric is too thick to see the pattern underneath, you may wish to use another method for transferring your design like a transfer pencil and hot iron. However be aware that not all transfer pencils wash out so make sure you use one that does.

Flower pattern

3. Fit your free motion sewing foot to your sewing machine. I have a standard Brother foot that I modified using this really excellent tutorial. You don’t have to modify your foot – just makes life a bit easier. I’m all for easier.

Modifiedf free motion sewing foot

4. Sew over your design.  Free motion sewing can take a little bit of getting used too so you might want to practise on some scraps first. Here are some good tips and here’s a video of a guy doing a free motion sewing portrait. It’s amazing but his fingers seem to go so very close to the needle it makes me shudder. No blood on the fabric – that’s my rule.

T-shirt for Daisy

You’ll notice how the fabric has puckered – especially around the flowers. That’s what happens with stretchy material and, again, I like it because it gives texture. However, if you want a flatter result, simply iron some tear-out or wash-out stabiliser behind your design before you begin.

So can you guess my niece’s name?  And no, smart arse, it’s not Roughly-Sketched Indeterminate Flower.

And I’m worried you might think they called her Carnation.

Free motion Daisy with stem

It’s a daisy, people. And so is she.

PS: Alex and Jo own and run the fabulous  and beautiful St Isidore on the NSW South Coast. The restaurant is in both the 2013 Gourmet Traveller’s Restaurant Guide and the Sydney Morning Herald Good Food Guide. Do go and give it a go if you’re in that part of the world and tell ’em I sent you. It’s a cracker.

Washi tape jam jar lids: how-to

 Washi tape confetti jam jar lid

Ahhhh washi tape: is there anything thou canst not improve?

confetti washi tape jam jar lids

I have been bottling up a storm lately. Well, when I say lately, I pretty much just mean today. I bought 17kg of tomatoes at the farmers’ market this morning and at this point have 4kgs worth bottled and sitting on my shelf contemplating a saucy life. But more on my direct transition from my thirties to nonna-hood in a later post.

  Jam jar lids with washi tape

For now, I wanted to share another way you can use washi tape; to prettify the lids of your homemade bottled stuff.

Washi tape strips on jam jar lidI LOVE giving away bottles of stuff I’ve made but I’m always slightly irked by the crappy lids on my oft-recycled jars and bottles. Baking paper and baker’s twine are nice but they are outta there once the bottle is opened for the first time.

Washi tape around edge of jam jar lid_edited-1

Decorate your tops with washi tape and the lids will stay as perty as your preserves within.

Trio of washi taped lids

If your lids are a dark colour or heavily patterned, pop a small disc of white paper on top before you start to washi (yes, it’s a verb now too) so your tape is light and bright.

Strips of washi tape on white disc

Trim overhanging bits with an exacto knife or that surgical scalpel you’ve had lying about in the top drawer.

Trim edge of washi tape from jam jar lid

PS: The stuff in these bottles was meant to be plum jam but it never set. So I called it plum sauce. And it was delish on crepes.

ON AIR sign: a tutorial

ON AIR lamp lit up

I came across this SMYG lamp on my most recent foray to IKEA and I gots me an idea. I do love an IKEA lamp hack. Here’s my last one.

I initially bought it with the idea of personalising it for my niece’s birthday but then she’s in the US and this sucker is a bit heavy to post overseas. Not to mention the whole plug conversion pain in the arseyness. It’s a word. You know it is.

So I had a little ponder about things that light up and as I’ve always loved old-fashioned ON AIR signs thought I’d have a crack at that.

ON AIR lamp 2

What you need:

IKEA SMYG lamp. In Australia the product number is: 002.017.77.

Spray paint

Exacto knife or paper scalpel of some description

A bit o’ tape.

What to do.

1. Print your stencil then carefully cut it out using your exacto knife. Go slowly. I give you that advice from bitter experience.

I originally wanted to use Helvetica as my font but the capital “R” was not right. So I ended up using Arial Bold printed at 120 points. I like its simple, utilitarian look.

TIP: Don’t forget to save your in-between-y bits like the centre of the “O”, “A” and “R”.

2. Unscrew the plastic panel from your lamp.

3. Cut your stencil down to a size that will fit nicely on the panel and then tape it on.

ON AIR stencil on plastic panel

Initially I has thought to use double sided tape around each letter to get it to really sit flush against the plastic. But I gave up on that idea as too much like hard work and just used double sided tape for the centre bits of the “O” etc. So just really nestle your paper on down as close to the plastic as you can and tape the sides on like this:

ON AIR stencil taped to panel

If some bits of the stencil are clearly sitting up a bit from the stencil, you can use little bits of double sided tape here and there to get any recalcitrant sticky-uppy bits sitting really  flat.

4. Tape a plastic bag around the rest of the plastic panel so you don’t get any paint on it.

ON AIR stencil ready to be sprayed

5. Spray your plastic panel. With spray paint. What are you? A wild cat?

Because I’m impatient, I gave mine two coats of White Knight Quick Dry Gloss Enamel in Royal Blue. If you’re more patient that I, three or even four coats would give a really solid look.

6. Allow to dry. If you have had some leakage out the sides of your stencil, you can use a cotton tip dipped lightly (don’t soak it) in nail polish remover to carefully clean those up. I didn’t have any leakage (on my stencil – just so we’re clear) , but there was some slight fuzziness around a couple of edges that messed with my perfectionist tendencies. I did some really minor cotton tip work.

ON AIR lamp close up

7. Plug it in, light it up and pretend you’re Daddy Warbucks sending out a message to Annie’s real parents.

You can rotate the angle of the lamp. Like so many IKEA products, it’s a clever little piece of design.

ON AIR lamp

It’s also designed to be hung on the wall. Which I think I’ll do but haven’t decided quite where yet.

Other ideas: personalise with a name; make one as  nightlight for a baby or toddler’s room and stencil “SLEEP” on it. When it’s on, the kid knows what it says and to stay the dickens in bed. We could have used one of those.

Either way, I think if you have a go I think you’ll feel pretty smyg about the results. Annoyingly smyg.

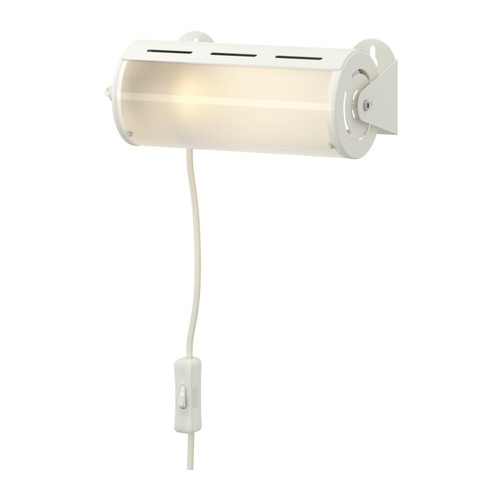
IKEA Smyg lamp

Image source: ikea.com.au

Someone thinks I’m super. And a star.

promo_twirlingbetty

If you’re not already familiar with it, Cut Out And Keep is a treasure trove of amazing craft, fashion, beauty and food tutorials; a repository for heaps of awesome stuff. And I am totally honoured and flattered and pink in the cheeks to be their most recent Crafty Superstar.

Here’s a link to my virtual trailer. In case you’re wondering, it’s quite a large trailer with heated toilet seats and a well-stocked bar. Knock loudly if you’re coming in, the plush carpets tend to mute outside noise.

Cut Out and Keep has a great online mag called Snippets.

medium_cover_1315000531 medium_cover

Every day this week the lovely Cat, who runs the joint, will be posting a different twirling betty tutorial. And there’s a bit of a blurb about me as well. Including an embarrassing musical taste admission (although it’s not so much the music as the man himself) which for any long-term readers of this blog will come as no surprise but may make others vomit a little into their mouths. The thought of which, in turn, makes me giggle.

I hate the word “giggle” by the way. What am I? A 5 year old? But chortle makes me sound like Rumpole of the Bailey and laugh is too general. Maybe snicker is what I’m looking for. Only without the mean connotation. Any and all suggestions for the appropriate word gratefully accepted.

You know what I mean.

cut_out_and_keep-67d3d02a140dab149051ed00d5bec365

Just go on over and look at my superstarry-ness will ya?

————————

2 other things:

1. Remember these Due Punti rings I posted about a while back? Kate from Bensimon Diamonds saw that post and got in touch to let me know they have an introductory offer of 2 due punti rings for $99. That, my friends, is a good deal. I’ve already availed myself of it and two more friends have Due Punti rings in their future. Preciousssssss rings.

2.  I posted about our family photo shoot recently. Fi Mims, photographer extraordinaire, has posted some more photos of our family on her blog. I highly recommend Fi if you’re in Melbourne and in search of someone lovely to take some family snaps.

And just so we are totes clear, as always, those are not sponsored plugs. I just think 1. is a genuinely good deal on something I love and 2. is a doll who takes great photos.

Although if any cool company wishes to sponsor me….I’ll be in my trailer. In a negligee. Listening to Slippery When Wet.

Washi tape cake stand border: Part VI of the Paper-punch-a-palooza series

IMG_5212

It’s been a while since we punched stuff together hasn’t it?

This is a bit of cheat really, as I’ve actually already shared this method of using a border paper punch on washi tape in this earlier Paper-Punch-a-Palooza post. But this is a whole new thing to which to apply it: cake stands! Obviously, you could do this on anything with a rim really. But keep it clean please. Inanimate rims only thanks folks.

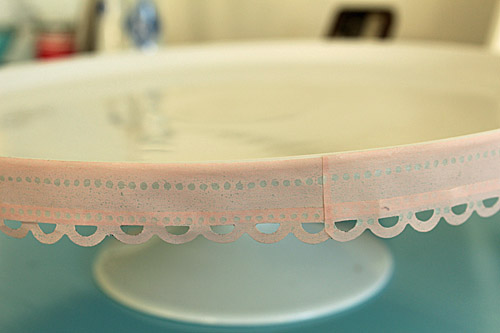
Here you can see that I made my border a little deeper by starting with a strip of unpunched tape  and then stuck a scalloped strip slightly overlapping the bottom  edge of that. It’s easiest to prepare your border first and then stick it on, by the way. It saves quite a bit of screaming from frustration.

Washi tape cake stand border

Cute, huh?

Cake stand with washi tape border

This is a post in twirling betty’s Paper Punch-a-palooza series.

Lilac large paper punch-a-palooza series header

If this has got you in the mood to crack out your supplies and punch something  – and then pull our your paper punches and make stuff  – then you might be inspired by these other posts in the series:

1. Paper punch stencils

2. Paper punch fabric luggage tags

3. Paper punch washi tape stickers

4. Paper punch sparkly snowflake envelope

5. Paper punch soap confetti

Punch it up my aggressive little possums, punch it up.

Ruffled crepe paper wings: a tutorial

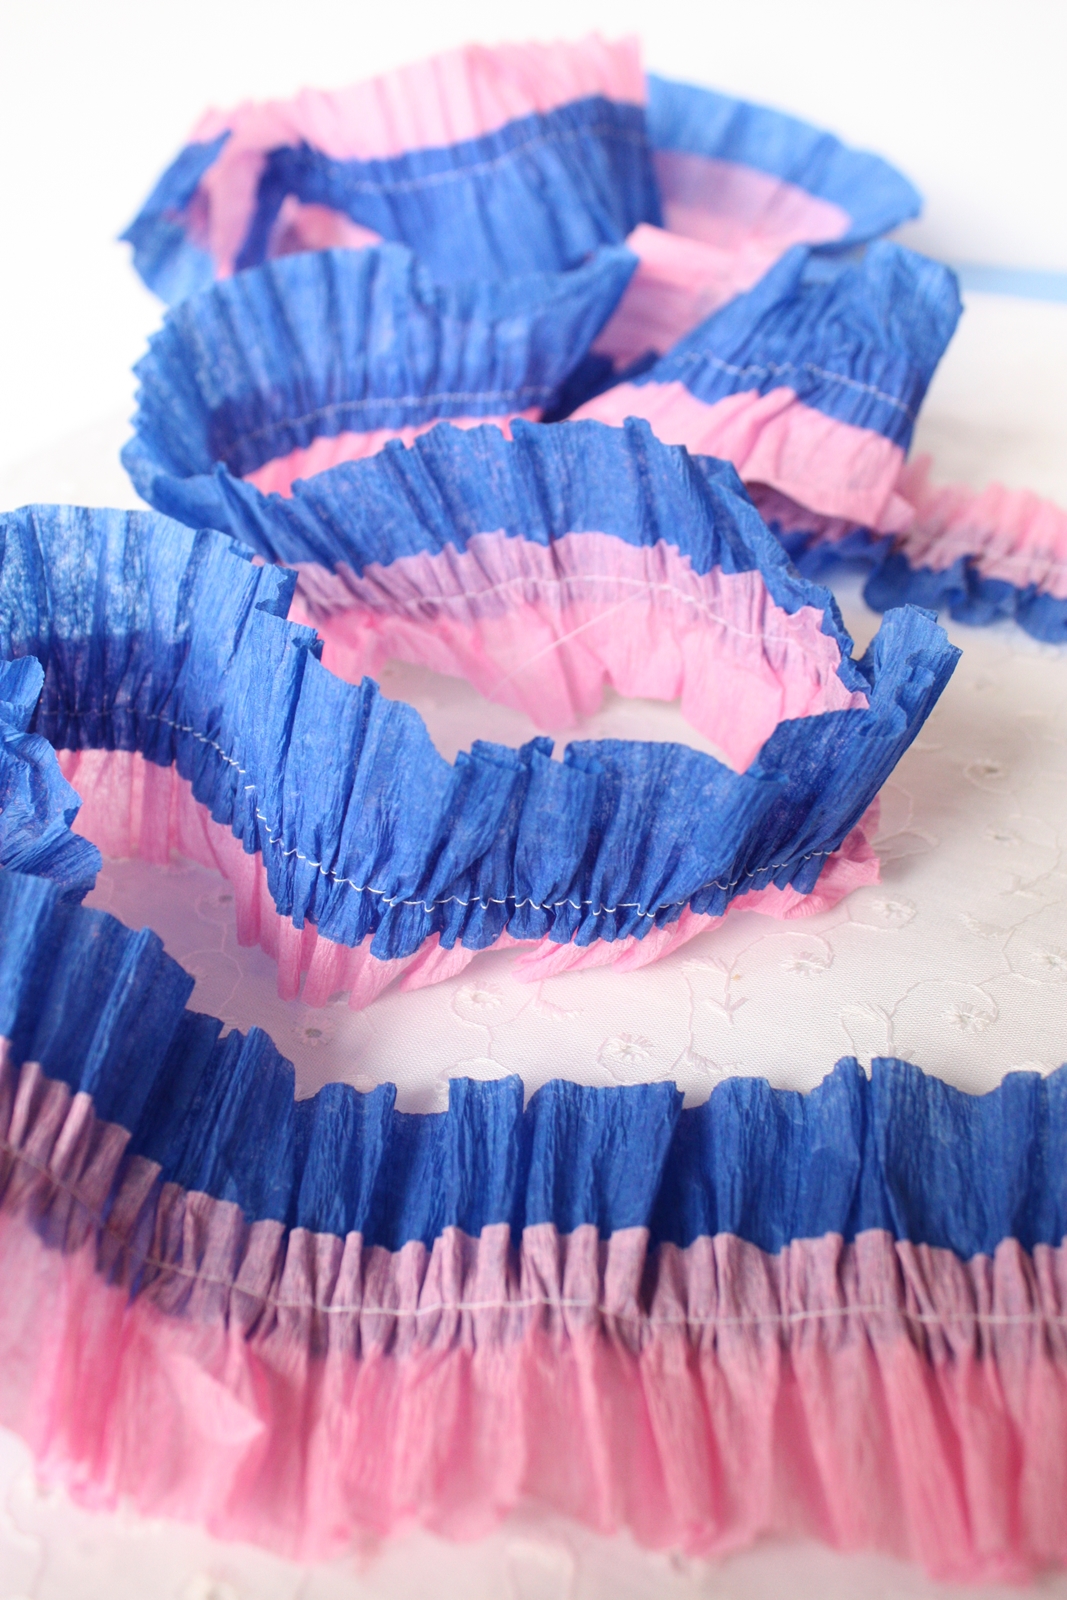
A while back I threw a birthday lunch for a dear friend. To give the table a festive feeling I decorated around it with ruffled crepe paper streamers.

These are easy to make (with a sewing machine) and kind of mesmerising and meditative to sew once you’re in the rhythm. There are lots of tutorials floating around but I like this one.

I couldn’t bring myself to throw them out afterwards but space is REALLY at a premium in our little cottage and I didn’t want to store them  (yet another piece of stuff) just on the off chance I might use them again. So I laid them out and just looked at them for a bit. And they spoke to me of flight. The mere fact the streamers were speaking to me was reason enough to keep them. But then the streamers whispered “wings”.

And after I had convinced my handsome husband not to call the mental health hotline because the streamers were speaking to me, I made these.

These are surprisingly robust given they are basically made of paper. I mean they probably won’t survive a rain storm, nor a really spirited tussle between siblings but for what they are, they are pretty strong.

In any case, I quite like the vaguely insubstantial nature of these; wings should be somewhat delicate and ethereal don’t you think?

What you need:

  • Crepe paper streamers
  • Around 70 cm (27″) fine elastic. I used underpants elastic as it was what I had. I have no idea why I do have it though as I’ve never made nor intended to make underpants. Yet another of life’s mysteries.
  • 4 rectangles of felt, 3cm x 9cm (about 1″ x 3 1/2″)

What to do:

1. Sew your crepe paper streamers into ruffles. There are lots of tutorials online showing how to do this. I quite like this one. MADE ruffled streamers.

2. Sew your ruffled streamers together.

3. Make 2 panels – each just slightly larger than roughly the  length of your kid’s arm and the length from their  neck to their bottom. Don’t be neat, don’t be precise and don’t worry too much about being straight. These are meant to look kind of imperfect.

4. Once you have 2  panels of sewn streamers big enough lay them out and cut two wing shapes.

5. Sew around the edge of each wing shape to contain the loose end threads.

6. Now take a contrasting streamer and fold it in half length ways – enough to go around each wing.

7. Sew this  casing or binding around the edges to conceal the rough ends and give them some more strength.

8. Hold your wing up against your child and mark points at the armpit and wrists where you will sew the elastic loops.

9. Measure around your kid’s arm and wrist and then sew elastic loop in roughly that size to top edge of your wings.

10. Take your felt rectangles and make a slit about 3cm down from one of the short edges.  Feed the elastic loops through.

11. Smother the back of the felt with craft glue or felt glue. Fold the felt in half  on itself (ie, including over the top edge of the wings) so that your loops are reinforced.

12. Give your kid permission to fly.

13. Give yourself permission to drink whichever tipple you prefer for a job well done and another day of avoiding the insane asylum. Just.

Bloody talking streamers.