A while back I showed you this height chart I made for Sophia and Olive and now I’m delighted to offer a tutorial for you to make your own.
What you’ll need:
- Calico fabric. You will need to cut your rectangle to 132 cm x 30 cm, so 140cm of calico for some fudge factor is probably what I would buy. The calico needs to be heavy enough that it will fall well when it’s hung but not so heavy that it’s stiff as a board. I wish I could give you a thread count or something but I can’t. Just feel the calico between your fingers and go with your instinct.
- Textas/felt tip pens (just normal ones are fine – they needn’t be permanent)
- Fabric scissors
- Wooden dowel: 2 pieces; each with a diameter of about 1cm and length of 34.5 cm
- Something to decorate the edge of your chart. I use a jumbo roller stamp but there are plenty of other options and I discuss some of these further on in the tutorial.
- Measuring tape or ruler
- Embroidery needle and thread
- Alphabet embroidery transfer or similar
- Embroidery transfer pencil
- Split pins
- Paper swing tags
Instructions:
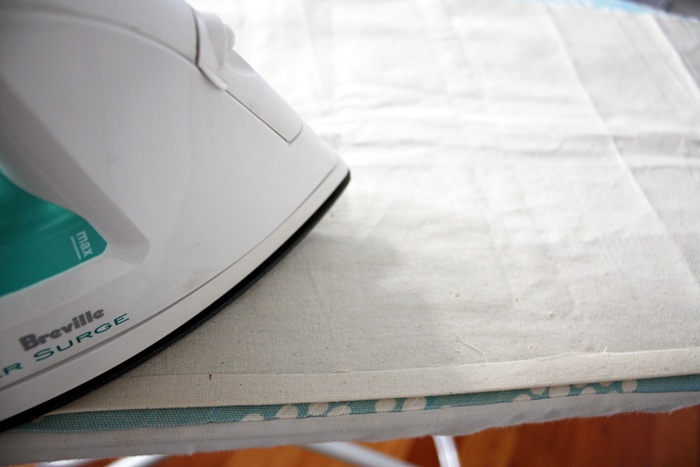
1. Cut a rectangle of calico 132cm by 30cm. Fold all 4 edges in 1 cm and iron.
You’ll end up with this.
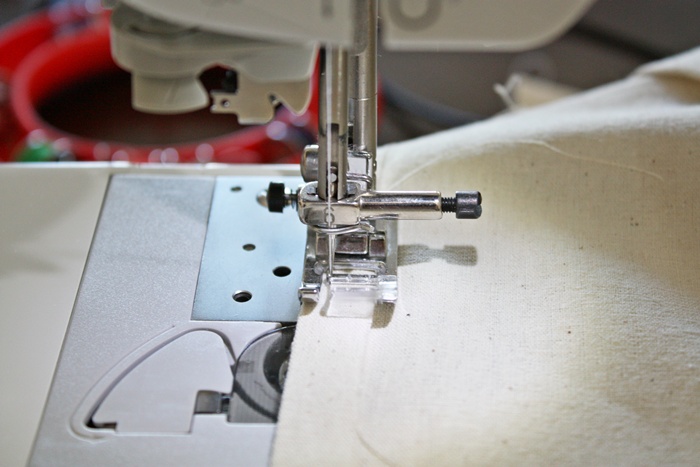
2. Sew around all four edges leaving a 1.4 inch seam allowance. Sorry to jump from metric to imperial measures but, you know, I’m just keeping you on your toes. Keeping your minds sharp. You’ll thank me when none of you descend into early dementure.
I just use the outside edge of the presser foot as my guide. If your needle is aligned to the left side, that’s just under 1/4 inch. Look, frankly anything up to 1cm is fine. Unlike tarot card reading, this is not an exact science.
3. Fold each of the short ends of the rectangle over 3cm (1 and 1/4 inch) onto the back of the chart and sew in place to create the casing for the wooden dowel.
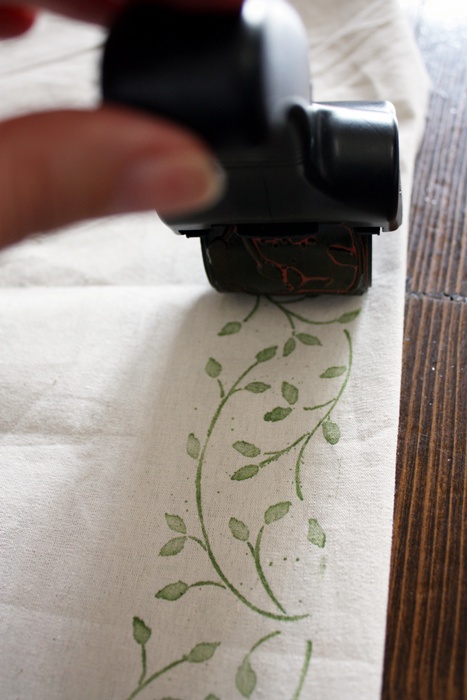
4. Stamp your vine on to your chart.
If you’re using a jumbo roller stamp, roll it firmly and slowly up the entire right hand side using the seam as your guide. That is, don’t stamp it right to the edge or it looks unbalanced.
These jumbo roller stamps consist of a cylindrical stamp with a continuous print, an outer casing with a handle that the stamp itself clicks into that allows you to roll it and a little ink pad (housed inside the roller) that inks the stamp as it goes. They do, I must admit, rock.
However, when I made the first chart I didn’t have the casing or the stamp pad insert. So I just rolled it on the pad, then with a finger at either end I rolled it up one revolution, re-inked, rolled another revolution and so on. Not an elegant way to do it but it worked out fine.
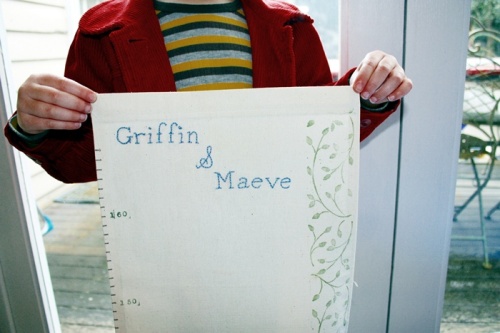
For the chart you see at the end of this post, I used the roller casing. Can you spot the difference?
Now, don’t despair if you don’t have a jumbo roller stamp with vine motif lying around (although, frankly, all the best people do). Anyway, here are some other suggestions for decorating the right hand side that are in keeping with our “growth” theme:
Buy a traditional stamp and just repeat it up the border. Make sure it is quite wide though – 5.5 cm at least – because you do want this decoration to stand out.
Flocked trim like this that was glued or gently sewed would look great. I have this trim, that I bought in a sale, in brown, black and red and think I’ll make some charts using it in the future. It’s beautifully textural.
The not-so-great thing is I can’t recall where I bought it from. This seems somewhat similar though.
Another idea would be to use fabric paint and either free hand a vine or plant design or use freezer-paper stencilling if you wanted more precision. Here’s a freezer-paper stencil tutorial I like. You can get Freezer Paper at Spotlight.
Or search for wall stencils. There are lots on ebay and in craft stores. I think this could look great if you used fabric paint and repeated it up the side.
Or, search for flowery, vine-y fabric like this Amy Butler fabric (especially the grey passion vine – LOVE). Or this would look amazing. Anything with a growth theme would be good really. Simply sew a decent strip (by decent I mean 5.5 centimtres or so wide) up the right hand side where the stamped vine would otherwise be.
You could even embroider a vine design which I think could look incredible if you had the patience and skill. I haven’t either though I’m afraid.
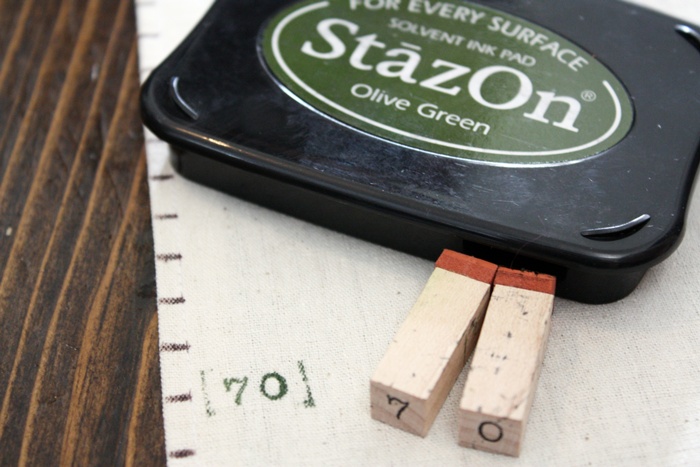
A word on ink before we go on. I used StazOn ink in Olive Green for the first chart (even though it isn’t really recommended for fabric). It worked well and didn’t bleed. On this second chart, I used a Rollagraph Ink Jumbo Cartridge in Pine Green – which is one that slips inside the roller for continuous inking.
5. Now create your embroidery transfer. I used one of the alphabet templates provided in the back of the Sublime Stitching by Jenny Hart which I also recommend for anyone keen to learn the basics of broidsing.
Using everyday baking paper and an embroidery transfer pencil, trace the names remembering (VERY important) to do it backwards so when it comes time to flip it and iron on the transfer it will appear the right way.
You can also simply create your own template on your computer. But again, remember to reverse the layout so it prints back to front because after you’ve traced it you’ll be flipping it so it irons on the right way.
Otherwise, the only flipping you’ll be doing is flipping the bird to yourself for having ironed it on the wrong way. I’m speaking from bitter experience my friends. And yes, I have flipped myself the bird on occasion. But only when I’ve really deserved it. Put me straight back in my place it did too.
Right, so stop trying to see if flipping yourself the bird is even possible (I so know you are trying right now) and let’s get back to biz.
6. Iron your design gently onto your chart in a spot where it looks good and, most importantly, balanced.
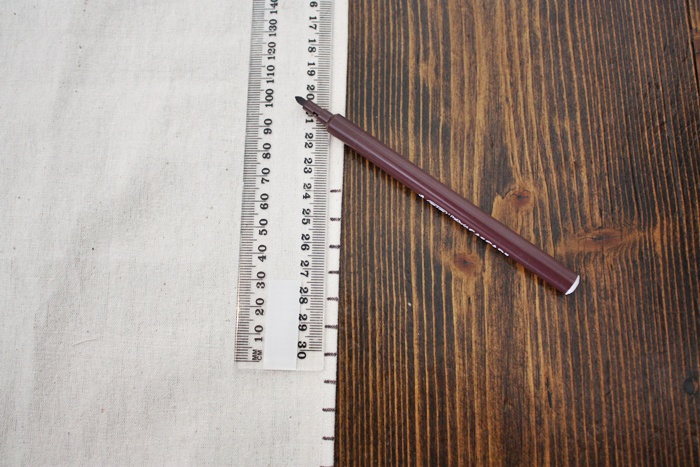
7. Once you’ve ironed your name or names on, you can mark the centimetres (or inches) onto the left hand longer edge of the chart using a ruler and an ordinary texta (felt tip pen).
I can’t guarantee that these marks would survive a round in the washing machine but hopefully your chart wouldn’t get so dirty that it would ever need a wash.
If you’re concerned, you might like to track down a more permanent fabric pen to make your marks. I don’t recommend Sharpies though. They bleed. So do test anything you use first.
8. Stamp numbers every 10 increments. I used StazOn ink in Olive Green again. Remember, because your chart will hang a certain distance off the floor, the numbers on your chart are going to start around 50cm or 60cm (which are the centimetres that presumably your child has already [selfishly] grown) . The dimensions of this chart allow you to have from 60cm to almost 170cm because I think 50cm from the very bottom of the chart to the floor just looks right when it’s hung.
You will also see that I stopped my numbers at 160cm although my increments go to almost 170cm so that I didn’t crowd the embroidery.
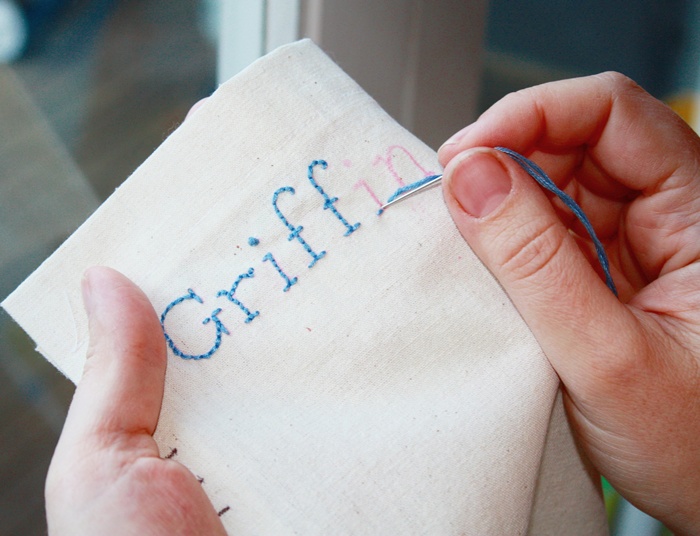
9. Embroider the names on. For this chart I used all 5 strands of broids floss to get a nice, clear effect. A darker colour would require fewer strands of floss. Although this is kind of a personal preference kind of thing.
10. Thread your dowel through the casing at each end and then tie some string or ribbon to the top piece of dowel to create a “hanger”. I made a couple of notches on the dowel with a knife so the string wouldn’t slide.
11. Measure your kids. Get cross with them for growing too fast.
12. Use split pins to mark heights. You can just gently push the pins through the fabric or make a tiny slit with a craft knife if you prefer then slide the pin through.
13. Stamp or write details onto swing cards and tie around split pins.
Or you could write straight on your chart if you’re not as uptight about being neat as I am. I hate my handwriting so I tend to avoid that option.
14. Pat yourself on the back for a job well done (on your kids and the chart).
15. Shed a few tears because despite your best efforts to stunt them, your kids are still going to grow and, in the proverbial two shakes of a lamb’s tail, they’ll be off the chart.
16. Pour large glass red wine to console yourself. Drink.








So beautiful! This would be an excellent present for someone who is having a baby! My children are too old for this, but I know I will make these for friends and family 🙂
Oh thanks Meg. I think they would make a great baby gift. And something the receiver would (hopefully) have through the child’s whole childhood. Do let me know if you make one. xx
The broids really set it off, don’t they… 😉
Nice work, I think if looks awesome
Cx
Yes, they set it off a treat I think. A true treat. x
I knew this tutorial was would be a great read, when you got around to writing it. (It definitely was, too.) What I didn’t anticipate was how many details there are in these beautifully simple growth charts. You did a really wonderful job with this post. I love it, and think it belongs in a book—there, I said it.
~dale
Ahhhh, Dale – you are such a sweetheart to say that. Thank you so much. I can’t tell you what support like that means to me. And I’m glad you enjoyed the tutorial! xxxxxxx
Thank you so much for sharing this tutorial Christen! I really love how classic and sophisticated it is.
xo
Thanks Thea. I’m so pleased you like it and it was my pleasure to share it. x
Thanks for the fantastic tutorial! I was thinking about what a great first birthday present this would be. I’ll definitely need to bookmark this one for when I’m ready to expand my crafty skills 🙂
Well that’s my total pleasure Lindsey – thank you for commenting! A first birthday present is a fabulous idea. Do let me know if you make one. You won’t need to do very much expanding of crafty skills for this…promise. If I can do it anyone can!
I came here from Diane’s article at cratzine.com about good blog design, hehe, and yours is! I just wanted to say I was here and your blog is extremely pretty. Oh, and the cute projects… YuM!
Hi Hanna – thanks for popping in. I’m delighted you found me through Sister Diane – a crafty person I greatly admire – and thanks for your lovely comments about my blog design. I appreciate it very much.
I came across this via Whip Up. This is brilliant, I was just saying to my husband the other day that I wanted to make fabric growth charts for my kiddos – so this couldn’t have come at a better time. I just love the style you’ve made these in, too. Fantastic. Thanks so much for sharing this tutorial for us ;o)
Thanks Stephanie. I’m delighted I could help! Thanks so much for leaving a comment.
I can’t wait to get started on this – what a beautiful idea and gift. Now I know what to do with my AB Passion Vine fabric. Thanks for this, another bookmarked tutorial.
Oh yay! I’m so excited you’re going to do it with that fabric – which I LOVE. Please please send me a photo when you’re done?
What a great and detailed tutorial! It’s really easy to follow along in all the steps and the outcome is darling!
Oh thanks Kate. Yes, there were quite a few more steps than I really realised I think! Got a shock once I’d finished to see what a long post it really was. Anyway, hopefully the detail will help others (like me) who like their hand held through each step. Thanks for commenting. x
Pingback: Tutorial: Stamped fabric growth chart · Sewing @ CraftGossip
This is so lovely!! I linked to your tutorial over at Craft Gossip Sewing:
http://sewing.craftgossip.com/tutorial-stamped-fabric-growth-chart/2010/07/25/
–Anne
Thanks Anne – and thanks for the lovely post over at Craft Gossip – a site I visit regularly! x
What a fun idea. I’ve wanted to make a “portable” growth chart for our kiddos that would move with us. I hadn’t considered something like this…it would be perfect.
Thank you kindly!
That’s my pleasure Chris. It certainly solves the problem of leaving having to leave behind pencil marks on the wall!
This (almost) makes me wish I had kids. I do have a five year old nephew… I wonder if it is too late to make him a growth chart. I love how great the tutorial is, and even more, I love how you infused it with your personality and humor. This was fun to read even if I never make one!
Thanks Deb. What a lovely thing to say. And I’m SO pleased you enjoyed reading the tutorial…I do try to make them a little less dry if I can. It makes me so happy to hear that this was a good read – and (almost) inspired you to (almost) contemplate kids!
wow, terrific job! It looks fantastic. I especially love the details with the jumbo roller stamp. I need to get me one of those! Where did you get it?
Thanks Anna. I got my jumbo roller online, on ebay. There always seem to be lots there. Thanks for popping in. Hope you’re having a lovely time in Yogya.
This could not be more timely! A very good friend of mine literally gave birth YESTERDAY, and so how awesome that I came upon this today (following a link from your comment on my latest tutorial)!
She already has a 2 year old, so I think it would be fun to make this for both of them…something for the two of them to do some sibling bonding over. 🙂
This is awesome b/c the newborn is a bit early, and I knew I wouldn’t have time to make my traditional baby gift – a crib quilt. But this is better, b/c it’s really for both kids!
Ah, that’s lovely news Valerie. I hope your friend and little one are doing well. Yes, it is a great gift for families with more than one kid – so they each get something. Well, their name on something anyway!
nice post, thx
This is just gorgeous! Beats the writing on the wall that we have – Can’t take it with you when you move! I particularly love the kids names. I have a friend who has a Maeve and I always liked Griffin since reading the “Griffin & Sabine” books.
Thanks for taking the time to write out the tutorial. Might just pass this one on to Mum….
Thanks so much Emma. I’m glad you like it. yes I love those names too – especially Maeve which I would consider if I ever had a third chickie. I hope Griffin and Maeve’s mum likes it too – I only got around to posting it off today! Thanks for popping in. I’m loving your speedy dinner series. xx
Pingback: Bobux Blog » growth lines for a lifetime.
After searching the internet for days on how to make a growth chart…I am so glad I finally found this one. This is exactly what I had in mind (and bought the materials for..yes I was a bit backwards on the planning..I shopped then looked up how to do it but that is how I roll). After reading the instructions (oh and thank you for helping me fight off dementia its greatly appreciated) I actually got as far as cutting both my fabrics…tomorrow I might actually attempt to iron the seams…then tackle hand sewing as I have no idea how to work a sewing machine…so I am hoping by the time my kids are 20…the 2 charts will be done (fingers crossed). I might actually ask someone to sew it for me (with the machine) to try and save a couple months…maybe these can be my kids graduation gifts. But on a seriously note, I am really happy I found your design as they are absolutely adorable…and enjoyed the way you put humor in the instructions, I actually laughed out loud on a couple as I was not expecting them. Thanks!
Hi Rebecca – I’m so pleased you liked the chart and that you got a laugh along the way. I’m sure your kids will love their grad gifts! That made me giggle.
Pingback: Jodified Photography + Design
Not really sure how I came across this post from 2010 but I am so glad I did. I have my first little one on the way and have been searching like a crazy woman for DIY projects that I can work on for her nursery. Thank you for posting this and keeping it posted.
So glad I found your post – I really enjoyed it. It is just what I was looking for. I am acquiring grandkids like crazy these days. Last year I made them all personalized pillowcases – think this year all the little ones will be getting growth charts!!! Love your sense of humor – you are my cup of tea.
Pingback: Oh Babies! « Craft Craze
Any chance that some version of this will go up in your etsy store?
Hi Leilani – I’ve emailed you directly in relation to this. Cheers.
Pingback: twirling betty on Ohdeedoh. « twirling betty
Pingback: The Birthday Gift «
Thank you so much for sharing! I’m working on one for a baby gift right now!
Pingback: how to tuesdays: thanksgiving for kids! « my handmade adventure
I’ve been digging through the Internets, looking for the perfect growth chart (which this is), but also I laughed my ass off reading this post. Bueno.
Can you tell me where you got that vine roller stamp. I can’t find one anywhere!! Please help!
I got mine on ebay – I’ve emailed you the details.
Pingback: Excessive houseproudness « serialdeviant.org(y)
Thank you for the tutorial! I used it to make a growth chart for my daughter:
It was also my first time doing any hand embroidering so it’s a little amateur, but I really like it 🙂
I LOVE this. Thank you so much for sharing the photo. I adore the flower pattern, the Kittys, the Japanese (? – sorry if I’m wrong on that) character. And, au contraire, it does not look amateur at all – it looks fabulous.
Pingback: 10 Best DIY Growth Charts | You Put it Up
This is brilliant, I’ve been trying to find a growth chart so I can keep it and take it anywhere we go and this is perfect. Thank you for sharing this, hopefully when I do make this it looks as good as yours 🙂
Pingback: Baby growth chart | My Blog
Totally in love with this! Love that it has Olive branches down the side, perfect for my little Oliver! Agree with your sentiments – cannot believe how fast they grow! Thanks for a great tutorial!
I hope this shows up as a picture, I just completed this growth chart for my son. I used your tutorial as a guide. I stitched ribbon down the side and used adhesive felt letters for his name.
Thank you for the tutorial, and I hope you enjoy my version of it.
Pingback: 10 Clever DIY Growth Charts - Moms and Crafters
nice tutorial , would want to try
Pingback: 4 Inexpensive DIY Growth Markers | Thrifty Divas
Pingback: 可愛く思い出を残しましょう♡ハイトチャート(身長計)BEST16 – Mer Make
Pingback: They Grow Up So Fast – 4 Super-Creative DIY Growth Markers | Thrifty Divas