
You know that old platitude about feeling the fear and doing it anyway? The picture above embodies that for me.
But alongside the fear, it was a moment in which I felt intensely, joyously, indescribably happy and alive. Pretty much as only diving into a hidden, waterfall-fed pool in the middle of the world’s oldest rainforest can make you feel.
So while fear and that incandescent spark that punches you in the lungs with joy every now and then are uncomfortable bedfellows, they are fellows nonetheless. For me, anyway.
I actually did this trip to Far North Queensland 12 months ago (and yep, have been meaning to write about it since then – I am not awesome at keeping up at the moment) but as we are about to embark on another couple of trips I feel the clammy hand of fear and worry mixing with the sweet anticipation. I kind of accept that this is how it will always be for me now. Post-Bali bombings I am a much more frightened, cautious person. But if I let that go to its natural conclusion I would also be a hermit. I’m tempted sometimes.

Instead, I keep on diving in. Because I just cannot let the fear take up the whole bed. I deserve at least half the space. And all the doona.
The trip to this waterfall was extraordinary.
We usually go to Far North Queensland for our annual family holiday anyway but this time I had tagged along as a spouse on a conference handsome husband had been asked to speak at.
The conference organisers arranged for the attending partners to explore either the rainforest or the reef. I was the only one who chose the rainforest tour. Which meant I got a private 4 hour tour of a part of the world I am obsessed with. My idea of total heaven.
Coincidentally, the group booked to run the tour, Daintree Discovery Tours, was the company we have always gone out with the three other times we have explored the Daintree and my guide that day was the owner of the company, Grant, whom I had met before. So when he realised it was just me we changed all the plans (as I had already done a number of the things he had planned) and devised a custom trip instead.
The highlight of which was Cassowary Falls. The falls are on private property and access to them is very limited. We drove in through the rainforest, across a croc-infested tributary of the Daintree River and onto farm land.
I have always loved the farm land in this area. It’s such a beautiful contrast: the manicured green pasture with the wild rainforest in the background.

It’s not all green and pleasant though. The cows that graze along this river are sometimes taken by crocodiles if they stray too close to the edge. Yep, they’re bloody big crocs.
So we drove in and then swapped cars for the final kilometre into the falls.
This was the view behind us – and you can see it’s a serious truck with those roll bars…
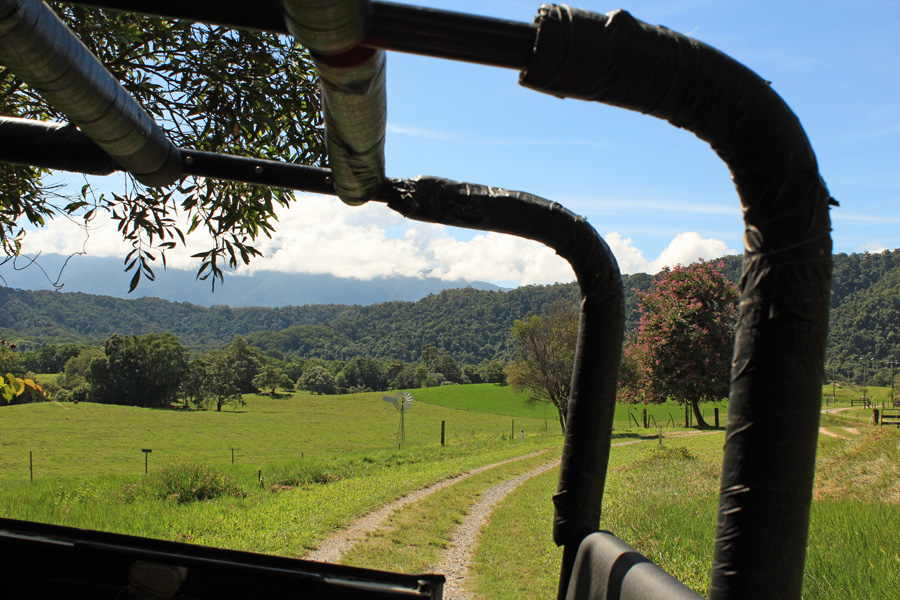
and this was what lay ahead.

We forded creeks, and bumped our way over muddy tracks through fields and into the forest again.

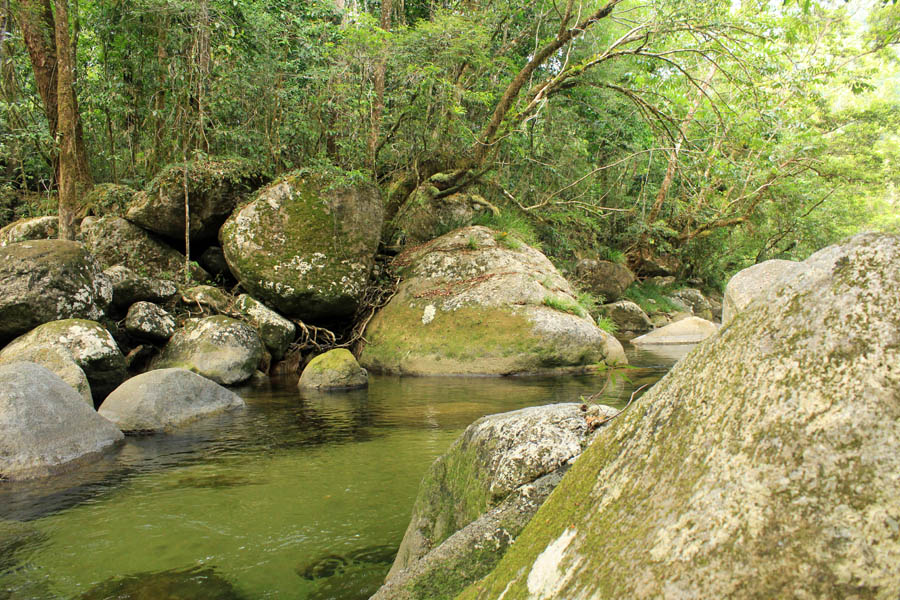
You have to walk the last 100 metres or so and then, suddenly, you find yourself in an oasis. It’s hard to describe what it’s like to stand on the rocky edge of a tranquil pool, the falls thundering down and the rainforest looming all around, lush and persistent.
And not another soul. It was pretty much a religious experience.

Grant convinced me two swim over to the falls and then dive back in. I knew the minute I saw the place that I was going to do that.
I mean, I knew it was safe to dive where I did because Grant did it first and showed me where to aim for a shallow dive. And I knew it was too high and cold for crocodiles. But still. There are cow-eating crocs just a couple of kilometres away and, well, what if genetic mutation has bred a cold-water tolerant, waterfall pool-loving man-eater of some kind?
It’s funny, the fear is there but something else takes over: the overwhelming desire to experience, to make the most of the moment regardless of the risk – real or perceived.
The next shot gives you a sense of the scale. You can see my little head floating below, looking back in wonder at the falls. Actually I’m watching a water dragon lizard scramble up the rocks but you can’t quite make him out.

So if there was a croc lurking in the deep he did not grab me. The turtles sunning themselves on logs stayed well clear and my only wildlife encounter was with the tiny leeches that attached themselves between my toes. Again. What is it with me and leeches? Grant said he’d never come across one in all his time bringing people into the falls. I, however, as this post attests, have now had more than my fair share of encounters with these suckers in this part of the world.
This photo makes me laugh.

I mean, any day you get to go off-roading in a zebra truck is a good day.

After Cassowary Falls we had lunch at a private spot at Mossman Gorge. Once again, a beautiful experience. And once again I got to swim in the crystal clear waters of the gorge all on my own. I still can’t quite believe it.


The year before when we were in Port Douglas for our annual family holiday we did a guided walk through this part of the rainforest (near Mossman Gorge) with one of the elders of the Kuku Yalanji tribe, the traditional owners of this land. It was one of the highlights of all our trips there.

I know I’m swiftly running out of superlatives but this part of the world does that to you.

Our guide was Harold and he is a revered elder and a renowned medicine man who not only uses the rainforest as his pharmacy but is also used by the North Queensland police as a professional tracker in hard-to-crack cases. He uses his peoples’ traditional song lines to navigate and locate people who are lost in the rainforest.

A thick book Harold showed us at the end of the walk attests to the fact he has healed hundreds of people from all over the world. As an interesting aside, he is also Cathy Freeman’s uncle and officiated at her wedding!
Here’s a hot n’ sweaty baby Betty!

She appreciated the swim at the end in this magical place.
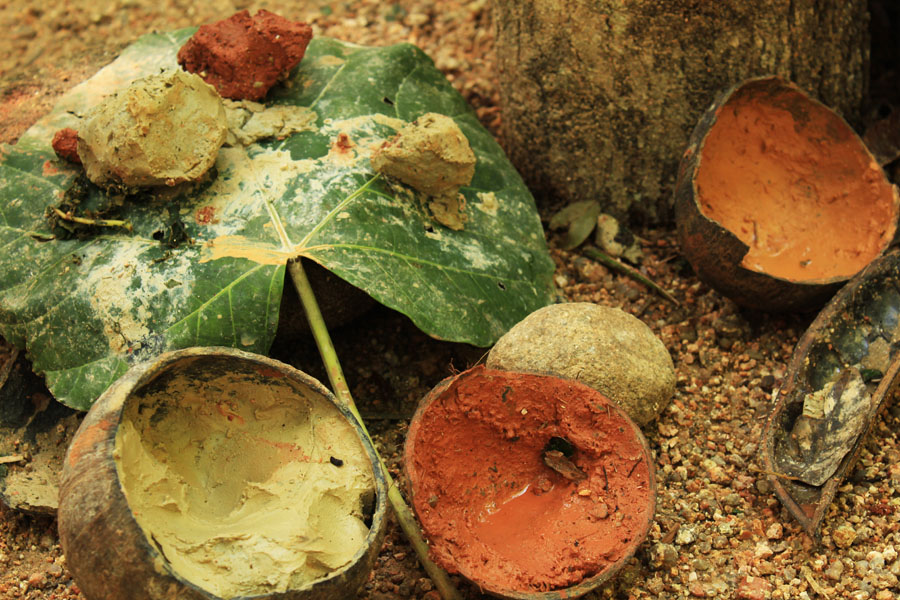
Harold was a superb guide and pointed out the eleventy billion things that can kill you but also talked about all the natural remedies and tools he uses ranging from plants and berries through to the pincers of the ubiquitous green ants that can be used in place of stitches or surgical staples to keep wounds closed.

There are berries that look so similar that pretty much only a Kuku Yalanji member could tell apart; one heals, the other send you blind. There are cancer-inhibiting plants. These are just starting to be explored by western medical interests. Happily, any profits that flow from future medical discoveries from this area – and the potential is HUGE – will be fed back into this community. That gives me comfort.
As we walked through dense forest the rhythmic echo of wood on wood became louder and louder. Suddenly a clearing emerged; a natural amphitheatre and there we listened to stories of the aboriginal dreamtime from this area.

I can’t recommend both of these tours enough. Daintree Discovery Tours for a general tour of the area and a Dreamtime tour with the Mossman Gorge Centre.
I don’t know why I feel such a strong pull to this part of Australia.But I just can’t get enough of it.

Here are some of my other posts about Port Douglas and surrounds:
Listen to Sir David Attenborough’s endorsement of the Daintree Rainforest over and above even the Amazon!
So tomorrow morning we head to the airport for our next adventure. One familiar place and one entirely new for us.
Deep breath. Dive in.


 I think homemade biscuits are a beautiful Christmas tradition and this year I decided to jettison my fear and attempt shortbread.
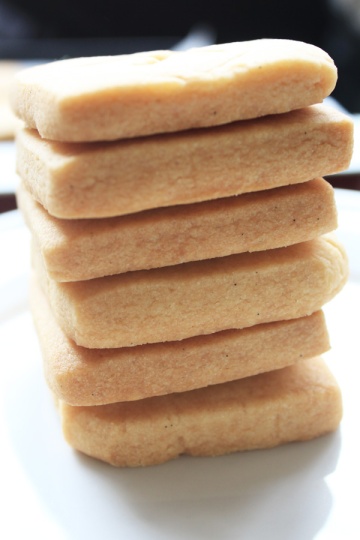
 Turns out I had shortbread all wrong. It’s really not too tricky.
 I popped some greaseproof paper inside paper bags – to stop grease stains from the high butter content – and gave them out to our school crossing guards who do a wonderful job of glaring at speeding cars and generally keeping us safe as we brave a busy thoroughfare on our way to school each morning.